Unlock a world of possibilities! Login now and discover the exclusive benefits awaiting you.
- Qlik Community
- :
- Support
- :
- Support
- :
- Knowledge
- :
- Support Articles
- :
- How to: Get started with the Zenput Connector in Q...
- Subscribe to RSS Feed
- Mark as New
- Mark as Read
- Bookmark
- Subscribe
- Printer Friendly Page
- Report Inappropriate Content
How to: Get started with the Zenput Connector in Qlik Application Automation (QAA)
- Mark as New
- Bookmark
- Subscribe
- Mute
- Subscribe to RSS Feed
- Permalink
- Report Inappropriate Content
How to: Get started with the Zenput Connector in Qlik Application Automation (QAA)
Jul 14, 2022 4:43:48 AM
Jul 14, 2022 4:38:34 AM
This article provides an overview of getting started with the Zenput Connector in Qlik Application Automation.
Zenput is a compliance management solution that helps restaurants, convenience stores and grocers create tasks, manage audits, track incidents, monitor performance and more on a centralized platform.
Adding the Connection in QAA
To get started with Zenput you need an API token, which you can find here.
For more info on the API token, see Getting Started (zenput.com).
Once you have the API token, connect to the data source using the API token.
Working with Zenput blocks
To work with the blocks in QAA, select the connector on the left and either scroll through the list, choose the filter, or type the name in the search box to find the endpoint block you want to use.
To access tasks data, the following endpoints are currently supported:
- List Tasks
- Get Task
- Create Task
- Update Task
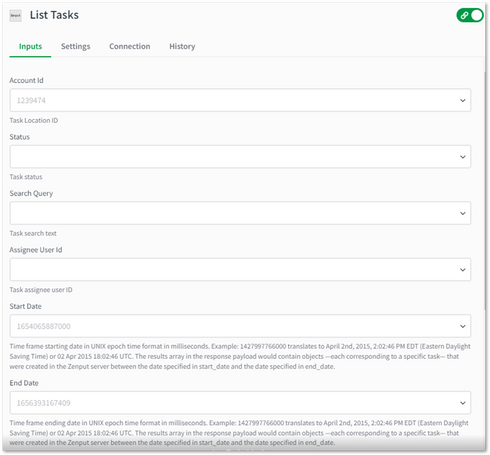
1. List Tasks: This gets you a list of tasks specific to you. You can add filters to narrow down the results.
Below is a typical example of a list tasks block.

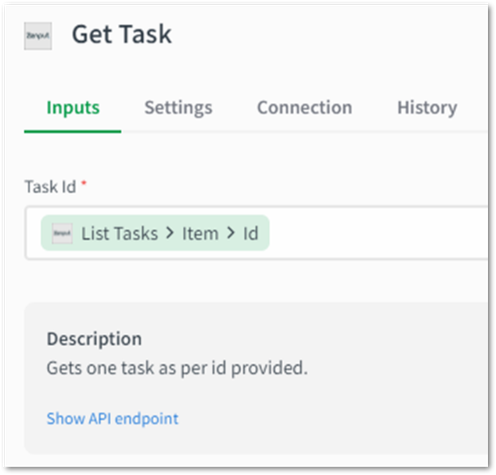
2. Get Task: Gets you record information specific to the task id you provide.
Below is a typical example of a get task block.

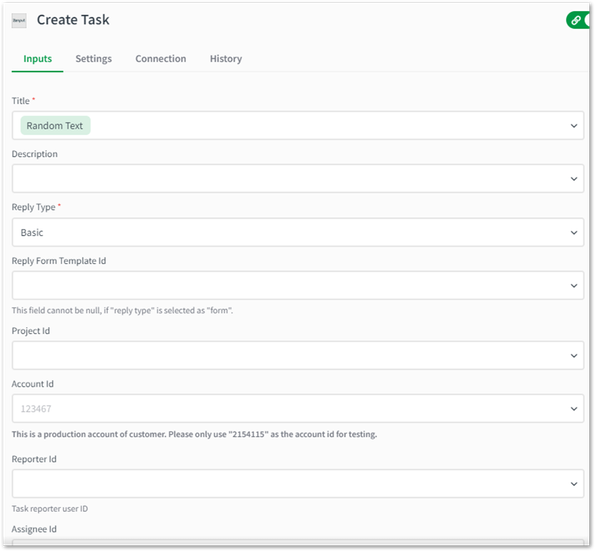
3. Create Task: This creates a new task record as per the inputs you provide. Returns an id of the new task created.
Note:
- Time Zone - The Zenput server can only consider the Time Zone if and only if Date Start and Date Due have values, and Date Start Naive and Date Due Naive do not.
- Date input options - Date Due Naive, Date Start Naive, Date Due, and Date Start can take many formats. Our recommended formats are - [YYYY-MM-DD] i.e.,2022-12-05 (to enter date) or [YYYY-MM-DD HH:mm:SS] i.e., 2022-05-05 23:55:00 (To enter date along with time).
**More examples on date formats are listed at the bottom of the document. We recommend you to test the date format once before using any other formats apart from those listed.
Below is a typical example of a create task block.

4. Update Task: Modifies/adds new fields to an existing task record, as per the id you provide.
Note
- Update task asks you for
- Leave any fields blank while updating the record it'll result in losing those values and making those fields null for that task. Hence, always make sure to fill all the necessary values while using update task endpoint before running the automation.
- Leave any fields blank while updating the record and we pre-fill values from existing task present, while you enter only the fields that need to be modified/added. This will not result in any data-loss, but you won't be able to make any fields blank incase it holds a value in the existing task record.
- Time Zone - The Zenput server can only consider the Time Zone if and only if Date Start and Date Due have values, and Date Start Naive and Date Due Naive do not.
If you enter values in all four date fields, or only date_start_naive and date_due_naive fields, it is likely that the time zone will be reset to a value different from the one presently set in task. - Date input options - Date Due Naive, Date Start Naive, Date Due, and Date Start can take many formats. Our recommended formats are - [YYYY-MM-DD] i.e.,2022-12-05 (to enter date) or [YYYY-MM-DD HH:mm:SS] i.e., 2022-05-05 23:55:00 (To enter date along with time).
**More examples of date formats are listed at the bottom of the document. We recommend you to test the date format once before using any other formats apart from those listed.
**Date formats can be anything the python-dateutil accepts.
Some examples of formats include: '2009-06-15T13:45:30', '2008-09-15T15:53:00+00:00', '2022-12-05', '2022-05-05 23:00:00', '6/15/2009', '2009-06-15 13:45:30Z', 'Monday, June 15, 2009 8:45:30 PM', 'Mon, 15 Jun 2009 20:45:30 GMT', 'January 19, 2038'.
You cannot use Unix epoch formats, such as '1245098730000' or '1245098730'.

