Unlock a world of possibilities! Login now and discover the exclusive benefits awaiting you.
- Qlik Community
- :
- Support
- :
- Support
- :
- Knowledge
- :
- Member Articles
- :
- Activate or Reactivate QlikView NPrinting Designer
- Move Document
- Delete Document
- Subscribe to RSS Feed
- Mark as New
- Mark as Read
- Bookmark
- Subscribe
- Printer Friendly Page
- Report Inappropriate Content
Activate or Reactivate QlikView NPrinting Designer
- Move Document
- Delete Document and Replies
- Mark as New
- Bookmark
- Subscribe
- Mute
- Subscribe to RSS Feed
- Permalink
- Report Inappropriate Content
Activate or Reactivate QlikView NPrinting Designer
Follow these steps to activate a new installation of QlikView NPrinting Designer or reactivate a deactivated one automatically if you have internet access.
Please note: This tutorial refers to QlikView NPrinting versions starting from 16.0, the licensing system, and the activation procces, is changed starting from this version. Now NPrinting activation, both Server and Designer, is similar to the QlikView one.
You can download NPrinting Designer from the qlik.com website. To activate your copy of NPrinting Designer, after installing it, or reactivate an installation that you deactivated to move to another machine after you have obtained a License key and a Control number.
Download NPrinting Designer

Log into the qlik.com website with your credentials and open the download area, then:
- Select the "QlikView" tab
- Scroll down the "Product" list and select "QlikView NPrinting Designer"
- Click on the setup to download it
Install it as an usual Windows software. Remember to right click on the setup file and select the option "Run as Administrator".
Start up NPrinting Client
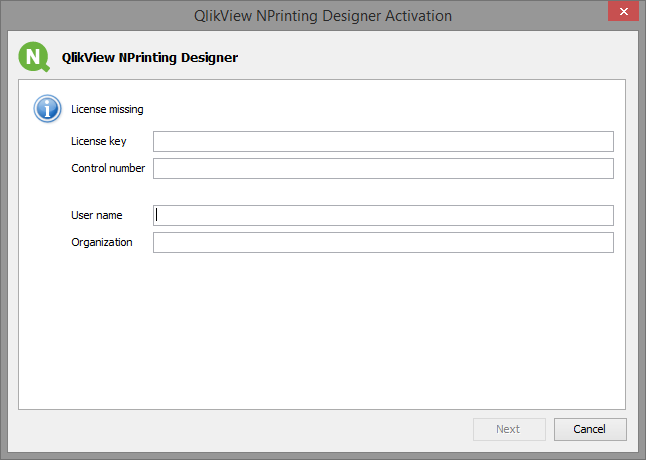
Open QlikView NPrinting Designer, you will see the window above.
(Re)Activate QlikView NPrinting Designer

- Insert your License key and Control number in the first two lines. The "Next" button will be enabled.
- Type your User name and Organization in the second two lines.
- Click "Next" to complete the activation
Enjoy Success
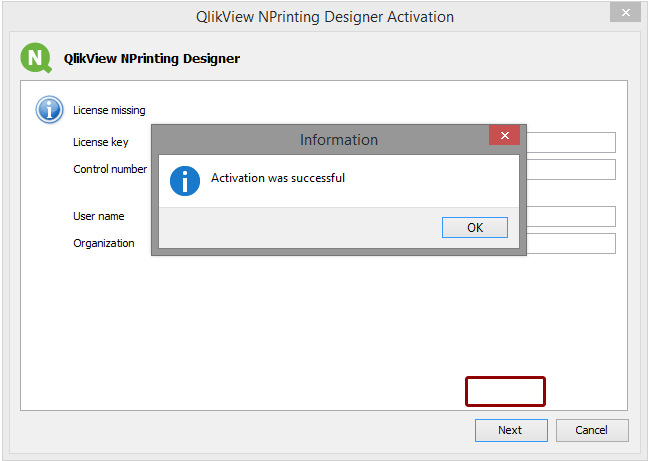
The message confirms that NPrinting Designer is activated. Click on OK to start NPrinting.
- Move Comment
- Delete Comment
- Mark as Read
- Mark as New
- Bookmark
- Permalink
- Report Inappropriate Content
Useful info for the people who are new to Nprinting..