Unlock a world of possibilities! Login now and discover the exclusive benefits awaiting you.
- Qlik Community
- :
- Discover
- :
- Blogs
- :
- Product
- :
- Design
- :
- Aligning objects and making a mashup responsive us...
- Subscribe to RSS Feed
- Mark as New
- Mark as Read
- Bookmark
- Subscribe
- Printer Friendly Page
- Report Inappropriate Content
From my previous blog Creating a webpage based on the Qlik Sense Desktop Mashup API, we've learned how to get the objects from our app and display them on our website with the Mashup API. These are individual objects though and most likely we would like to display them as we do in the app sheet.
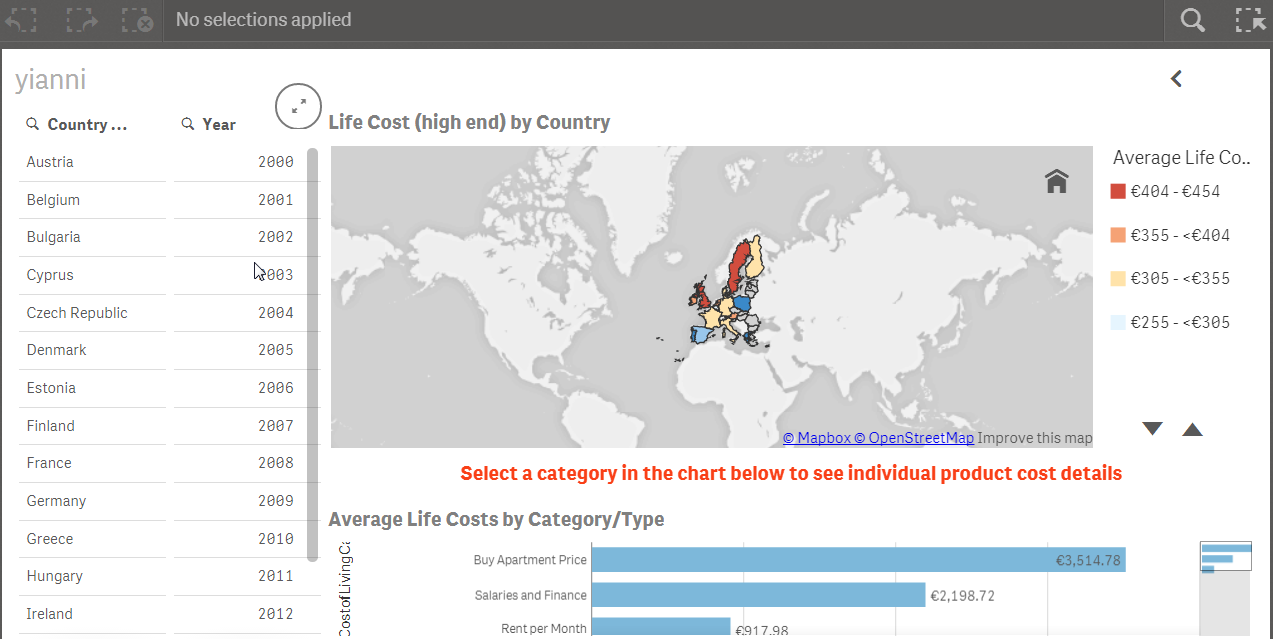
For this blog we will use the sheet from the "How European are you" app. So here is the sheet with objects.
- Make sure you add bootstrap css and js references in your html.
  <!-- CSS -->
  <!-- Latest compiled and minified CSS -->
  <link rel="stylesheet" href="https://maxcdn.bootstrapcdn.com/bootstrap/3.3.4/css/bootstrap.min.css">
  <!-- Optional theme -->
  <link rel="stylesheet" href="https://maxcdn.bootstrapcdn.com/bootstrap/3.3.4/css/bootstrap-theme.min.css">
  <link rel="stylesheet" href="https://sense-demo.qlik.com/resources/autogenerated/qlikui.css">
  <link rel="stylesheet" href="https://sense-demo.qlik.com/resources/assets/client/client.css" media="all">
  <!-- Custom -->
  <link rel="stylesheet" href="css/style.css">
  <!-- JS -->
  <!-- Latest compiled and minified JavaScript -->
  <script src="//code.jquery.com/jquery-1.11.3.min.js"></script>
  <script src="https://maxcdn.bootstrapcdn.com/bootstrap/3.3.4/js/bootstrap.min.js"></script>
  <script src="https://sense-demo.qlik.com/resources/js/external/requirejs/require.js"></script>
  <!-- Custom -->
  <script src="js/index.js"></script>
- In my previous blog in step 7, I used app.getObject(), to place the object into a specific div id. Now, we will go one step further and we will just use the object id from the app as our html data-qvid and we will let jquery handle the rest.
- So we start by laying out the grid for the above sheet. We need 3 columns and for the 3nd column we will need three rows.
  <div class="container">
     <div id="template">
       <div class="row">
            <!-- Left Column -->
            <div class="col-md-2">
                 <article style="height: 600px" class="qvobject" data-qvid="ZZpXPE" id="filterCountry"></article>
            </div>
            <div class="col-md-2">
                 <article style="height: 600px" class="qvobject" data-qvid="TrjNJ" id="filterYear"></article>
            </div>
            <!-- Right Column -->
            <div class="col-md-8">
                 <div class="row">
                     <article style="height: 300px" class="qvobject" data-qvid="KtCKy" id="lifeCostByCountry"></article>
                 </div>
            <div class="row notification">
                 Select a category in the chart below to see individual product cost details
            </div>
            <div class="row">
                 <article style="height: 300px" class="qvobject" data-qvid="jsmEE" id="avgLifeCost"></article>    </
            </div>
       </div>
  </div>
- We overwrite bootstrap's css for some elements that do not show up properly, like the icons below with:

.sel-toolbar-span-icon {
  top: -10px;
}
- and we make sure that all of the qlik sense objects are visible by setting their width to match bootstraps grid.
.qvobject {
  width: 100%
}
- Now we add in our js jquery's $.each method to display the objects in our grid.
$('#template').find('.qvobject').each(function() {
  var qvid = $(this).data("qvid");
  app.getObject(this, qvid);
})
- Finally, we need to add a clear selection button to mimic the app. In our html we add the button.
  <div class="row">
     <div class="col-md-12">
        <a id="clear" class="btn btn-default" href="#">Clear Selections</a>
     </div>
  </div>
- and in our js catch the click event with jquery and use the app.clearAll() method.
$('#clear').on('click', function(event) {
   event.preventDefault();
   app.clearAll();
});
There are times that you will want to use many objects in your page and you just do not want to split them up in multiple pages. If you see that there is not scrolling on the page, you need to add the following in your css.
body {
  overflow: auto !important;
}
Here is our final page that looks exactly like we have the objects in our Qlik Sense Desktop Sheet

That's it! I Hope you have fun with your webpages!
Project Files: yianni-ververis/how-european-are-you · GitHub
Website: Qlik Demos: See Qlik Sense in Action | Sense-Demo.Qlik.Com
You must be a registered user to add a comment. If you've already registered, sign in. Otherwise, register and sign in.