Unlock a world of possibilities! Login now and discover the exclusive benefits awaiting you.
- Qlik Community
- :
- Discover
- :
- Blogs
- :
- Product
- :
- Design
- :
- Run the Qlik Sense R-Plugin as a Windows service
- Subscribe to RSS Feed
- Mark as New
- Mark as Read
- Bookmark
- Subscribe
- Printer Friendly Page
- Report Inappropriate Content
With the Qlik Sense June 2017 release comes server side extensions, which allow you to extend the Qlik built-in expression library with functionality from external calculation engines. We've released an open source server side extension that enables interaction with R, and if you use the R-Plugin, you know that you have to start Rserve.exe and SSEtoRserve.exe, then restart the Qlik Sense Engine Service. What I'm going to walk you through is how to setup Rserve.exe and SSEtoRserve.exe to run as services, and then make the Qlik Sense Engine Service depend on those services so that they start whenever the Qlik Sense Engine Service starts.
This post is for people who have already installed the open source R-Plugin and would like to run the plugin as a Windows service instead of starting it manually. If you haven't gotten started with the open source R-Plugin, and would like to, please check out this guide sse-r-plugin - get started.
The first thing we need is NSSM. Download and unzip, then open a command prompt with admin privileges and change directory to <path-to-nssm>\nssm-{x}.{x}{x}\win64.

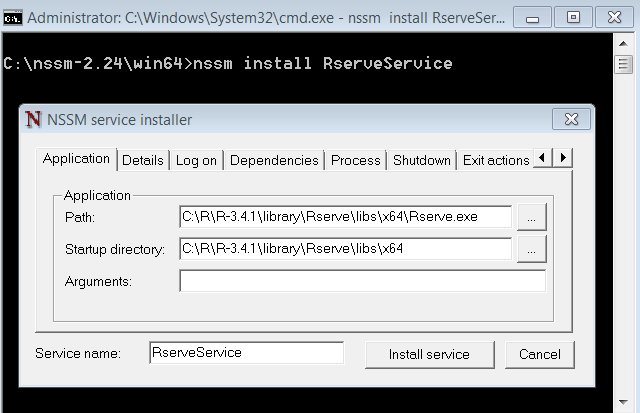
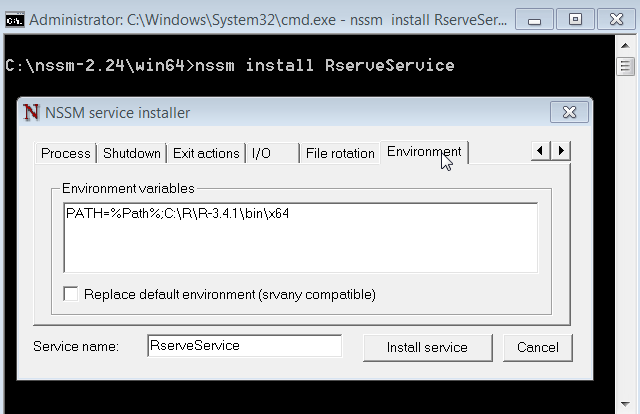
Now we need to install our 2 new services. In the command prompt, enter nssm install RserveService. An interface will pop up where we can define the service. Enter <directory>\Rserve.exe into "Path", and set "Startup directory" to the directory Rserve.exe is in. Then, go to the "Environment" tab, and enter PATH=%Path%;C:\R\R-3.4.1\bin\x64 (assuming you have R-3.4.1 installed in the C:\R directory, otherwise make adjustments as necessary). Now click the "Install service" button.
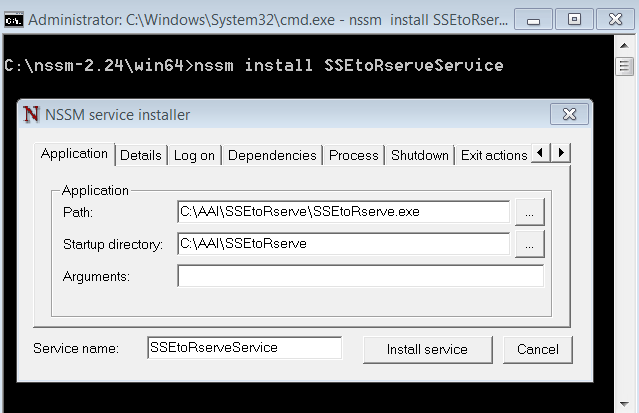
Next, we need to install a service for SSEtoRserve.exe. So, again, at the command prompt enter nssm install SSEtoRserveService, and then enter <directory>\SSEtoRserve.exe into "Path", and set "Startup directory" to the directory SSEtoRserve.exe is in. Now click "Install service".
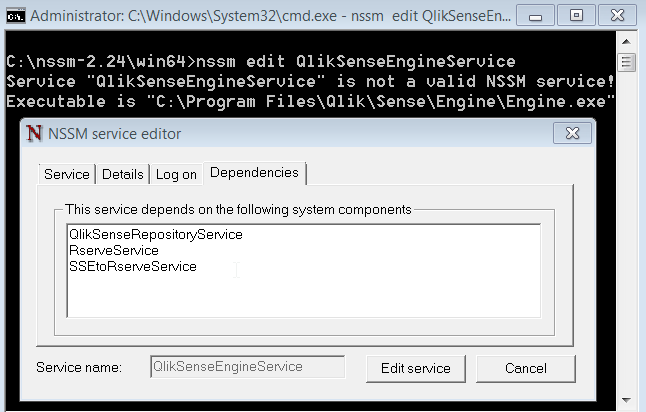
Now that the two services are installed, we can set the Qlik Sense Engine Service to depend on them, so that any time the Qlik Sense Engine Service starts, these services will be available. Back at the command prompt enter nssm edit QlikSenseEngineService. Go to the "Dependencies" tab and add RserveService and SSEtoRserveService, each on their own new lines under the already existing QlikSenseRepositoryService.
All of you have to do now is restart the Qlik Sense Engine Service and you should be good to go.
- « Previous
-
- 1
- 2
- Next »
You must be a registered user to add a comment. If you've already registered, sign in. Otherwise, register and sign in.