Unlock a world of possibilities! Login now and discover the exclusive benefits awaiting you.
- Qlik Community
- :
- Forums
- :
- Forums by Product
- :
- Products (A-Z)
- :
- Qlik Sense
- :
- Documents
- :
- Digitizing floor plans for use in Qlik GeoAnalytic...
- Edit Document
- Move Document
- Delete Document
- Subscribe to RSS Feed
- Mark as New
- Mark as Read
- Bookmark
- Subscribe
- Printer Friendly Page
- Report Inappropriate Content
Digitizing floor plans for use in Qlik GeoAnalytics (QGA)
- Move Document
- Delete Document and Replies
- Mark as New
- Bookmark
- Subscribe
- Mute
- Subscribe to RSS Feed
- Permalink
- Report Inappropriate Content
Digitizing floor plans for use in Qlik GeoAnalytics (QGA)
Apr 2, 2021 4:18:51 AM
Aug 1, 2018 8:06:23 AM
Update, the example app now have the drawing as a background.
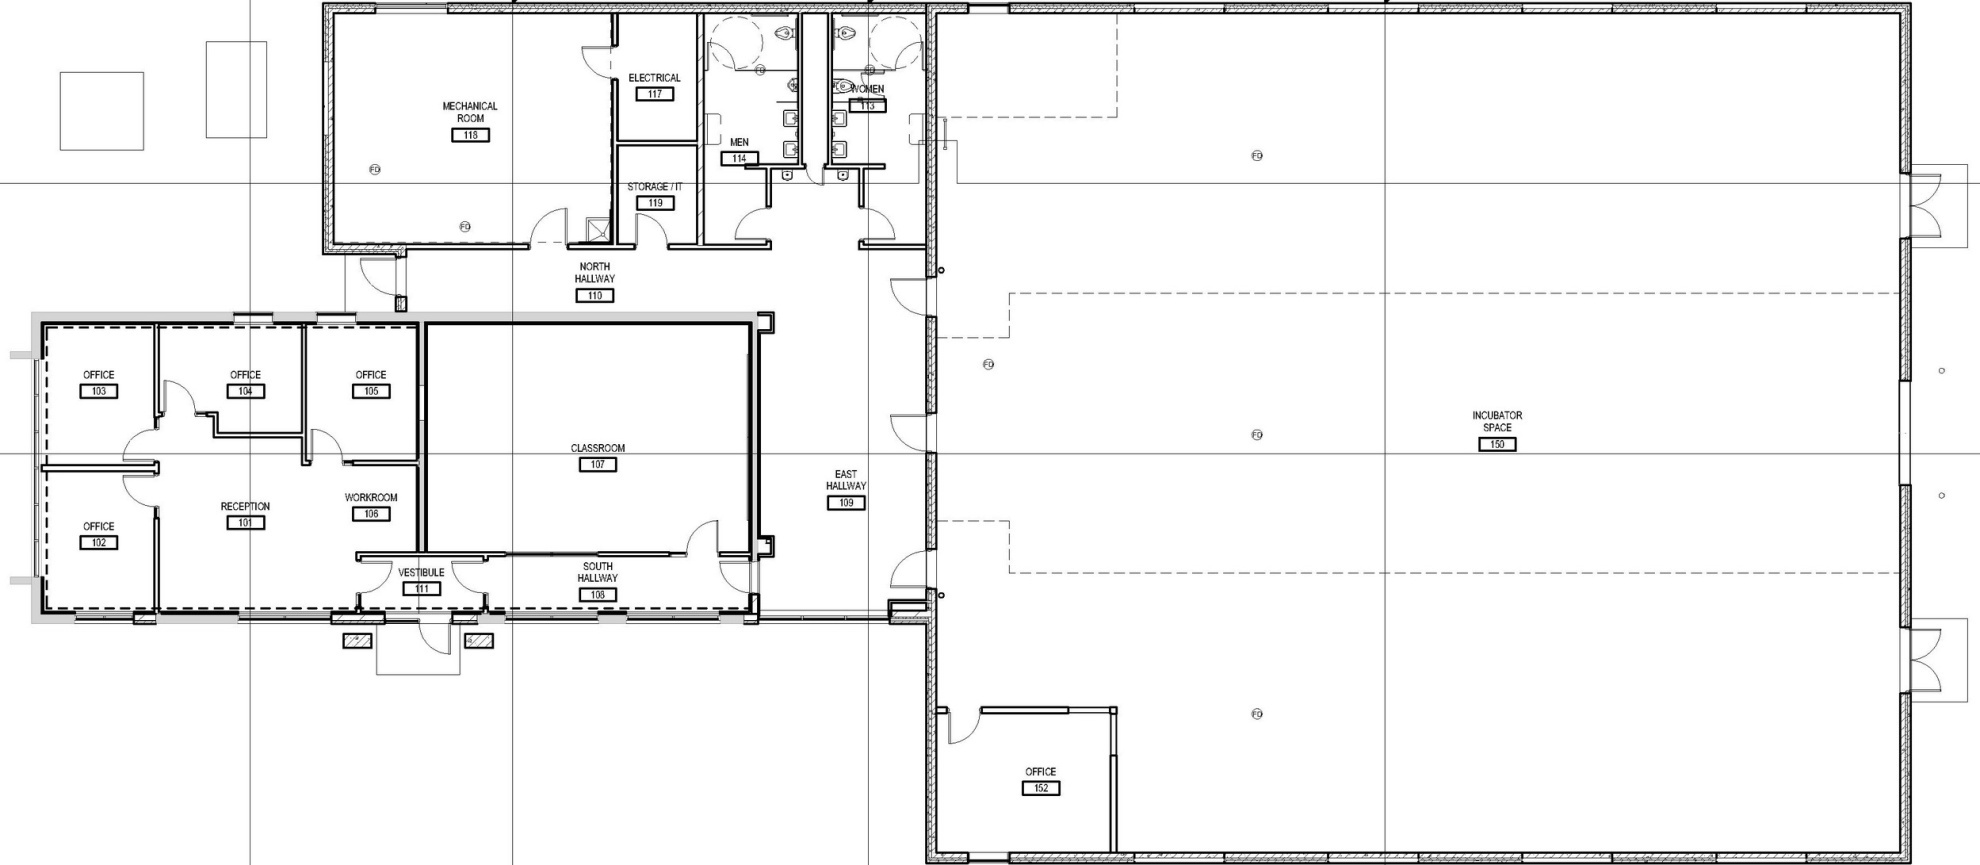
Floor plans and cad drawings can be useful, for instance in production dashboards, to visualize status and flows in a factory. However cad drawings are in many cases a mess to work with.
Here's a simple, pragmatic approach to digitize rather than import the actual drawing. The major issue with most CAD drawings is lack of structure, details without meaning and the objects on the right level are missing. It’s not the format or alignment that is the problem. In many cases it's better to use the drawing as a input to produce the polygons and information needed.
In this tutorial I use QGIS for digitizing and out put to a format that is easy to import to QGA. In this example the drawing is digitized in a local reference system, ie no alignment is made with the rest of the world.
Step-by-step guide
- Install QGA basic, Plus not needed if Dropbox et al is used.
- Install QGIS (https://www.qgis.org)
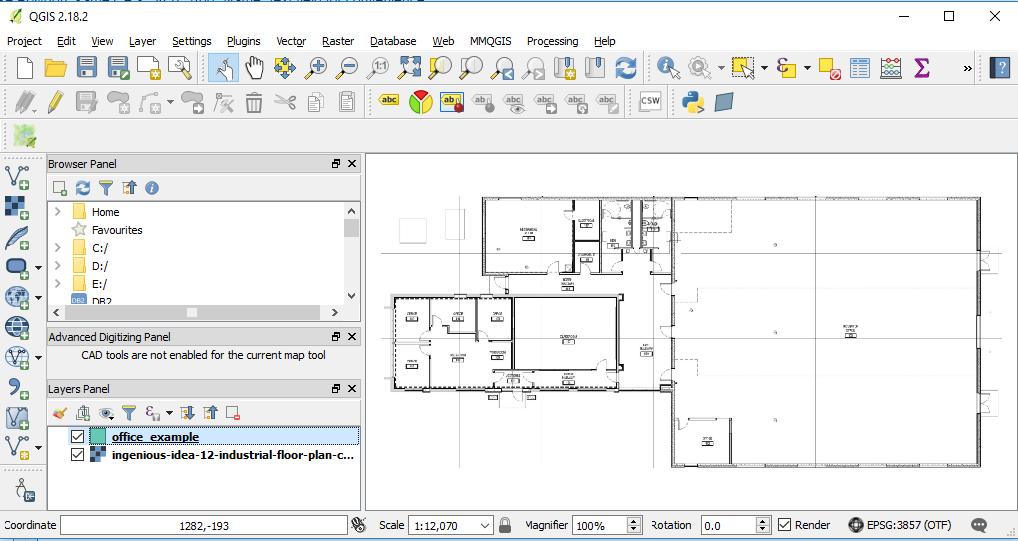
- Get a picture of the floor plan in an image format like PNG or JPG.
- Drag and drop the image to the layers panel of QGIS. Choose a meter based Coordinate Reference System, for instance EPSG:3857 is a good choice.
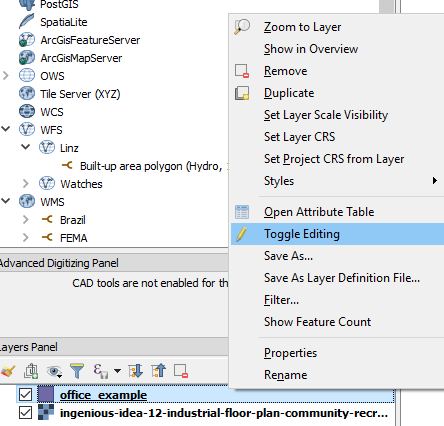
- Layer→ Create Layer→ New Shapefile Layer... Choose Polygon, same CRS, 3857. Add "Name" text field for convenience.

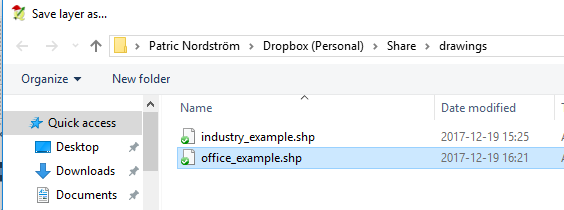
- Save layer in a folder. Preferable in dropbox folder.
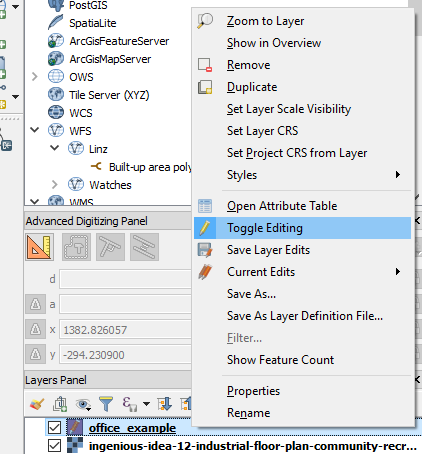
- Right click on the new polygon layer and "Toggle editing" to start editing.
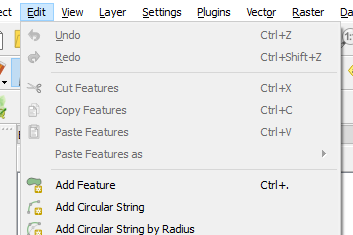
- Start adding features (Ctrl +)
- Click on the edges of the desired polygon, set id and name. Use node tool if fine tuning of edges is necessary.

- When done "Toggle editing"to save.
- Zip the shapefile to an archive and get the dropbox url. (replace www with dl to get direct link)
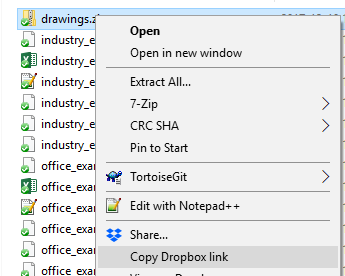
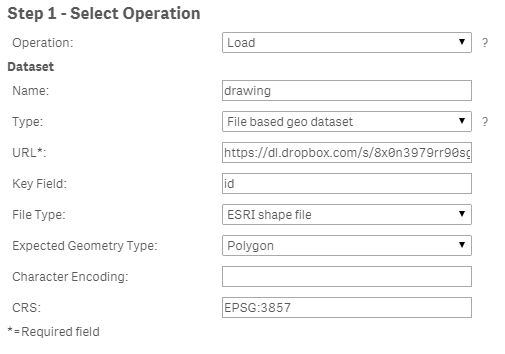
- Create a new Sense app and use the drop url in the Load operator of QGA connector. CRS: EPSG:3857. Note change url from 'www' to 'dl' for direct file access in dropbox.
Example app
The example app features sites and a drawing visible when one site is selected.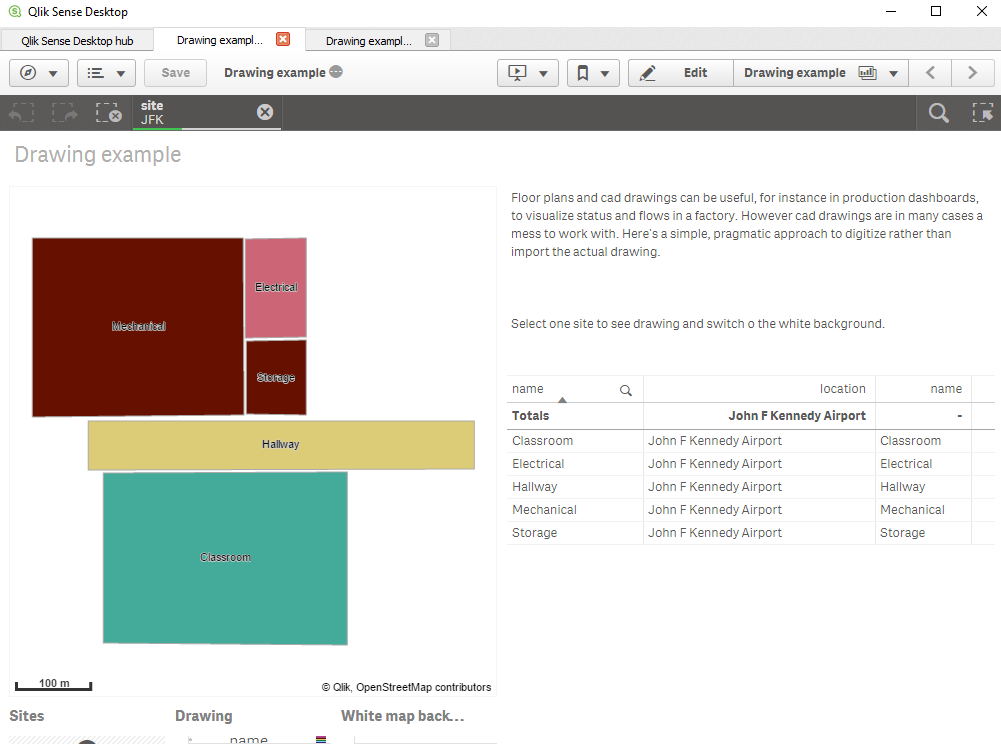
If you want to add and image background, here's how to scale and translate the image, in my example:

 Tip 1: get a white background use ='[[ [-180, -80], [-180, 80], [ 180, 80], [ 180, -80], [-180, -80] ]]' for location, set color to white and make the layer non selectable and not part of autozoom.
Tip 2, Use a bubble layer with coordinates for different sites, when one site is selected turn on drawing and the white background.
- Move Comment
- Delete Comment
- Mark as Read
- Mark as New
- Bookmark
- Permalink
- Report Inappropriate Content
Thanks for the tip Patric,
In the meanwhile I found this useful tutorial on youtube:
https://www.youtube.com/watch?v=hml7wX4O7Lw
And also there is a community post (with and example qvf attached):
I also found out that for the moment there is no direct loading of local images, one has to set up an IIS locally to access them via URLs...it might be useful for the dev road-map to have also this functionality available (local files loading from file-system not URL). The thing that currently really beats my mind is how to set the bubble size according to the dimension / measure value.
Thanks
Radu
- Move Comment
- Delete Comment
- Mark as Read
- Mark as New
- Bookmark
- Permalink
- Report Inappropriate Content
One way would be to use a Base64 data URI as the URL string.
Or to upload the image to the QS media library and then find out the URL to the image with JS dev tools F12.
- Move Comment
- Delete Comment
- Mark as Read
- Mark as New
- Bookmark
- Permalink
- Report Inappropriate Content
Thanks, for those in need here is a tried and verified setup:
1) The folder to load images from could be any custom XXX folder under:
...AppData\Local\Programs\Qlik\Sense\Client\img\...
2) The URL should look like:
='http://localhost:4848/resources/img/XXX/YYY.png'
@Patric_Nordstrom : I am still struggling with the topleft and rightbottom values according to the height/width value from the custom image in order not to have the image shrink inside the object canvas...
I thought that according to the above mentioned tutorial I need a loading script that should have this section:
bounds:
load * inline [
bid,by,bx
topleft,461,0
bottomright,0,909
];
where first parameter after topleft = image height (in pixels)
and second parameter after bottomright = image width (in pixels)
After that in the Background layer the Top (latitude) = image height (in pixels)
and Right (longitude) = image width (in pixels)
But still the image is not centered and shrinked inside the object canvas. Do you have any hints why?
Thanks
- Move Comment
- Delete Comment
- Mark as Read
- Mark as New
- Bookmark
- Permalink
- Report Inappropriate Content
Please check settings in the app from the post.
In that example the image is 1182x1915px.

Btw, serving images from localhost won't work in a network. Better to use the full URL.
- Move Comment
- Delete Comment
- Mark as Read
- Mark as New
- Bookmark
- Permalink
- Report Inappropriate Content
Hello,
@jfdierckx and @paulriedel have you already found an solution to bring in the background image into the GeoAnalytics map?
I can create the shapefile in QGIS and I manage to load to shapefile into Qlik Sense with the GeoAnalytics operations 'Load'. Furthermore the polygons are on the GeoAnalytics map.
But how can I add the background image to the GeoAnalytics map? @Patric_Nordstrom or @ChristofSchwarz do you have an advice for me/us? Or should we use the 'standard' Qlik Sense map instead of the GeoAnalytics map for custom maps?
- Move Comment
- Delete Comment
- Mark as Read
- Mark as New
- Bookmark
- Permalink
- Report Inappropriate Content
Hello Mr. Patric,
I am trying to do the same but with car parts. I manually drew the borders following an image which I later uploaded to a Qlik Sense library. I having some issues with the coordinates that are required to align both the image and the layer drawn in QGIS (I am using version 2.18.28). I have two questions pertaining to this:
Is there a way or method to get exactly the coordinates you need to align the image with the layer? If you see image 01, the image of the engine parts is not aligned with the shape layer. On the right, the pickup truck has a subtle difference at the back between the image and the layer; nevertheless, they are not in alignment with one another. In order to solve this, I tried a couple of numbers to no avail. As I mentioned before, the images in Qlik are the same ones I used to draw the lines in QGIS.
Am I missing something while exporting the shapefile from QGIS? Maybe, the scale of the image (Image 02.)
(Image 01)

(Image 02)

Best regards
- Move Comment
- Delete Comment
- Mark as Read
- Mark as New
- Bookmark
- Permalink
- Report Inappropriate Content
I would do small adjustment in the xscale "right (longitude)" (see my figure above) to squeeze the image width. That would probably do it.
Thanks,
Patric
- « Previous
-
- 1
- 2
- Next »