Unlock a world of possibilities! Login now and discover the exclusive benefits awaiting you.
- Qlik Community
- :
- Support
- :
- Support
- :
- Knowledge
- :
- Member Articles
- :
- Can I use Section Access with NPrinting?
- Edit Document
- Move Document
- Delete Document
- Subscribe to RSS Feed
- Mark as New
- Mark as Read
- Bookmark
- Subscribe
- Printer Friendly Page
- Report Inappropriate Content
Can I use Section Access with NPrinting?
- Move Document
- Delete Document and Replies
- Mark as New
- Bookmark
- Subscribe
- Mute
- Subscribe to RSS Feed
- Permalink
- Report Inappropriate Content
Can I use Section Access with NPrinting?
This tutorial illustrates how to create NPrinting reports from QlikView documents created with Section Access. Please refer to the official QlikView documentation which explains QlikView Section Access in detail very well.
The file C:\NPrintingTraining\QlikViewDocuments\SalesDemoSectionAccess.qvw contains this script at the beginning:
LOAD * INLINE [
ACCESS, USERID, PASSWORD, MAN ADMIN, ADMIN, ADMIN, *
USER, Elvis, Elvis, 2 USER, Helen, Helen, 9 ];
SECTION APPLICATION;
SALES:
LOAD * INLINE [
MAN, EmployeeID
2, 2
9, 9 ];
which creates section access with an admin and two users. Each user can see only his data because of the filter on EmployeeID.
The users and passwords are:
admin admin
Elvis Elvis
Helen Helen
N.B. NPrinting is not compatible with NT security in regards to recipients and associated filters, as things stand now.
QlikView NT security is based on Windows authentication, so it is not directly managed by QlikView. NT security checks the UserName of the user that is logged on the windows machine. This cannot be managed by NPrinting because the service does not log into the Window machine as a new user, so NT security access cannot be guaranteed to the NPrinting service.
It is necessary to remove NT security from the documents that is used by the NPrinting service to create reports.
If it's not possible we suggest you to create a copy of the QlikView document and save it on a protected folder.
Configure Document Properties
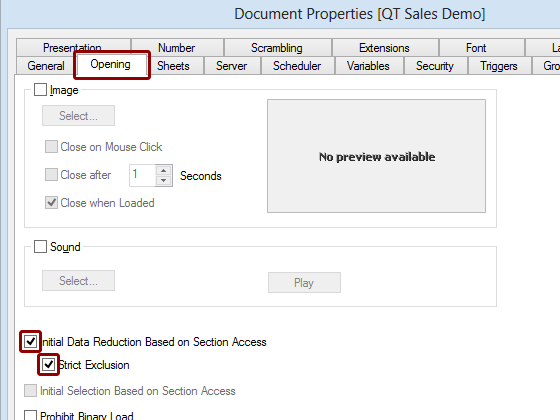
- Open QlikView Document Properties window (Ctrl + Alt + D) or Settings -> Document Properties
- Select the Opening tab
- Put a check mark in both the Initial Data Reduction Based on Section Access and the Strict Exclusion boxes
Open NPrinting File in NPrinting

Click on the Open icon on the File tab and browse to C:\NPrintingTraining\NPrintingFiles\NPrintingTraining.nsq and open it or if C:\NPrintingTraining\NPrintingFiles\NPrintingTraining.nsq is already listed under Recent Files, click directly on it.
Create New Connection
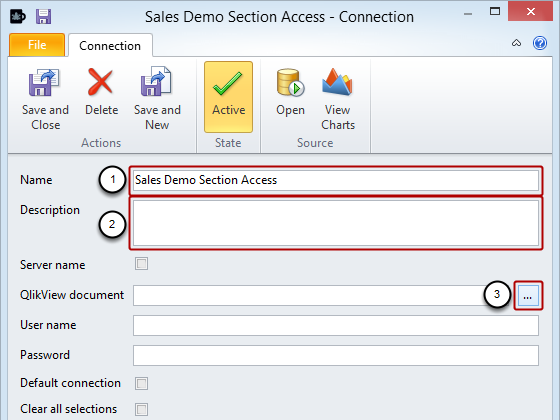
- Enter Sales Demo Section Access as the Name of the Connection
- Enter a Description (optional)
- Click on the browse button at the extreme right of the QlikView document field
Select QlikView Document
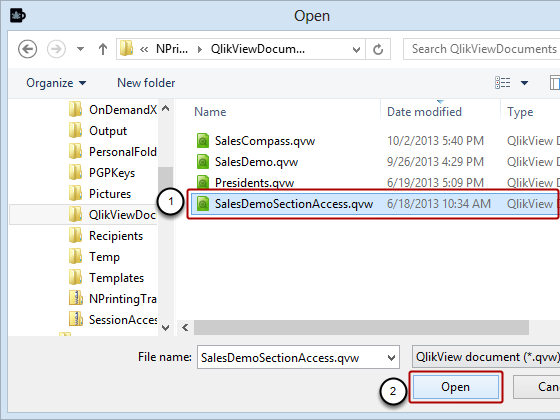
Browse to C:\NPrintingTraining\QlikViewDocuments\ and:
- Select SalesDemoSectionAccess.qvw
- Click on the Open button
Configure Last Parameters
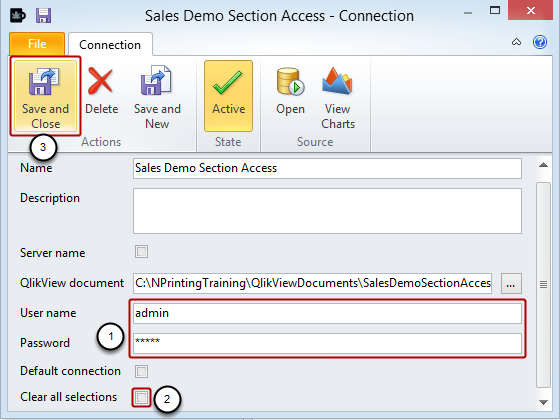
- Enter "admin" both as User name and Password
- Make sure there is no check mark in the Clear all selections box
- Click on the Save and Close icon
Create New Recipient
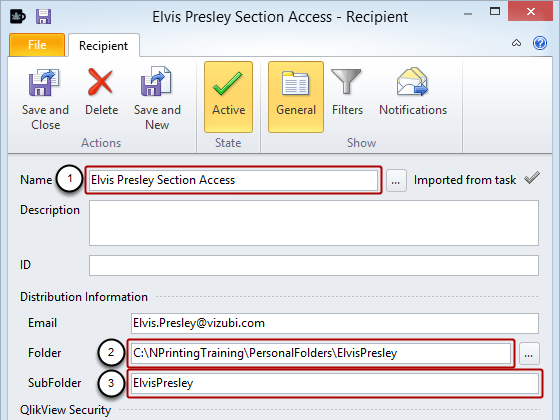
- Enter Elvis Presley Section Access for the RecipientName
- Enter C:\NPrintingTraining\PersonalFolders\ElvisPresley as the Folder name
- Enter ElvisPresley for the SubFolder name
Configure Security
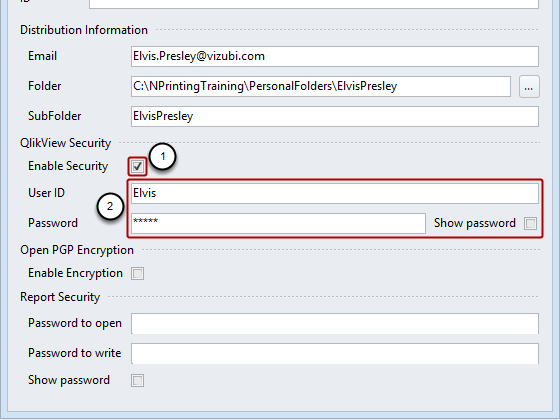
- Put a check mark in the Enable Security box
- Enter "Elvis" as both the User ID and Password
- Click on the Save and Close icon in the Actions group of the tool bar
Configure Helen Brolin Recipient

- Enter Helen Brolin Section Access for the RecipientName
- Enter C:\NPrintingTraining\PersonalFolders\HelenBrolin as the Folder name
- Enter HelenBrolin for the SubFolder name
Configure Helen Brolin Security

- Put a check mark in the Enable Security box
- Enter "Helen" as both the User ID and Password
- Click on the Save and Close icon in the Actions group of the tool bar
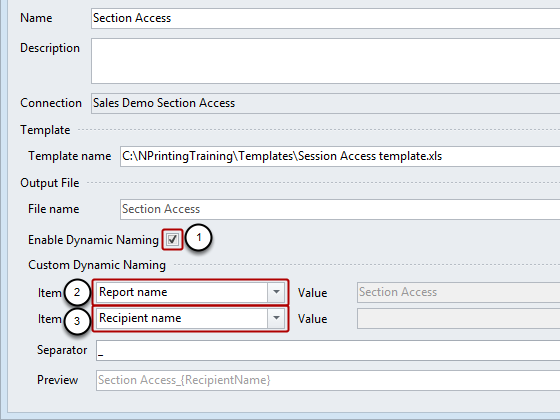
Configure New Excel Report

- Enter Section Access as the report Name
- Enter a Description (optional)
- Check the Enable Dynamic Naming box
Enable Dynamic Naming
Though this step is optional, it provides for more distinct, understandable file names
- Put a check mark in the Enable Dynamic Naming box
- Make sure that Report name is selected for the first Item that is present
- Add a second Item by clicking on the green '+' at the far right of the Item fields and set it to Recipient name
- Click on the New icon in the Template group to open the Template Editor
Create Template
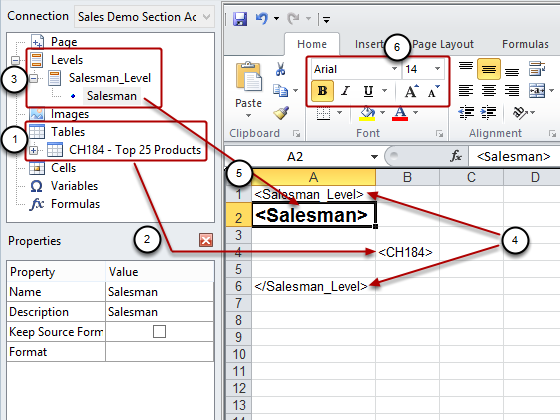
- Add the QlikView object CH184 to the table node
- Drag and drop it in the cell B4
- Add Salesman field as level
- Drag the Salesman_Level node token to A1 and the end tag to A6
- Drag the tag with the field value <Salesman> to A2
- Format it as 14px, Bold
Click on the Save As icon to conclude template development.
Save Template and Report
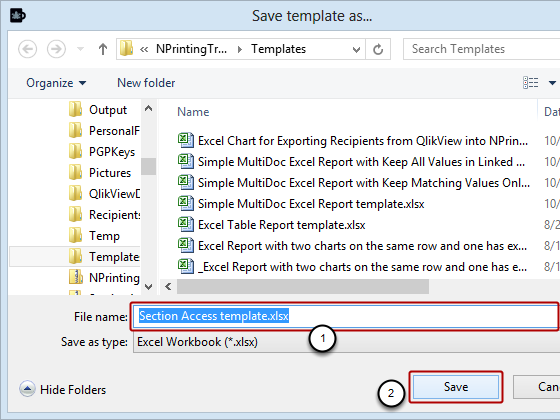
- Enter Section Access template.xlsx for the File name
- Click on the Save button
- Click on the Save and Close icon in the Report Editor window to save the report
Configure New Report Task
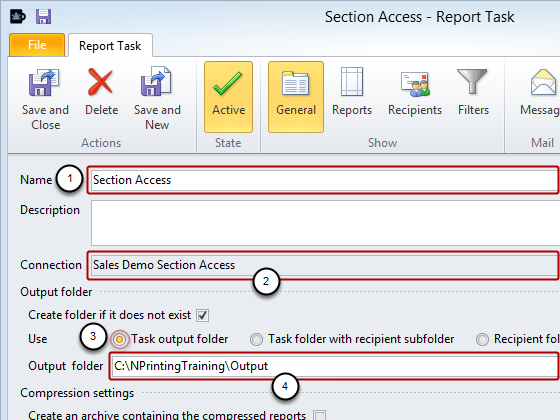
- Create a new Report Task named Section Access
- Set the Connection to Sales Demo Section Access
- Set Use to Task output folder
- Output folder to C:\NPrintingTraining\Output
Add Report to Task
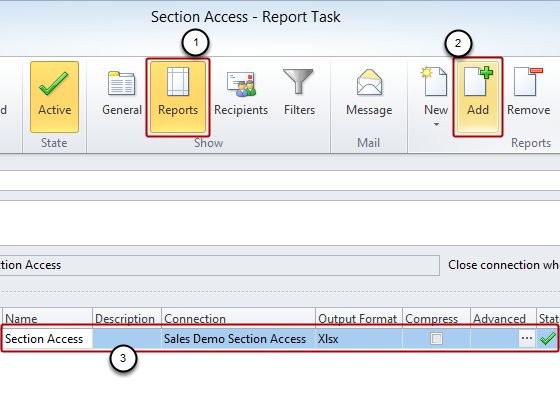
- Select Reports in the Show group
- Click on Add in the Reports group
- Add the Section Access report
Add Recipients to Task
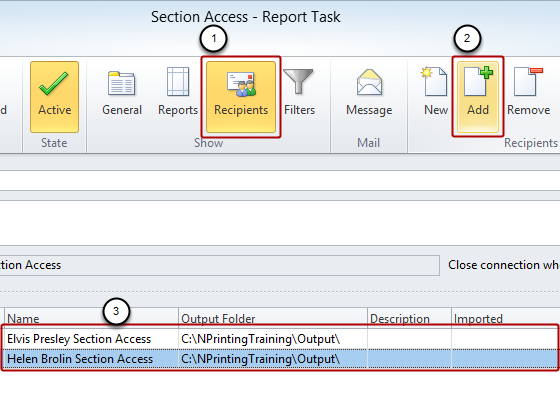
- Select the Recipients icon in the Show group
- Click on the Add icon in the Recipients group
- Select and add Elvis and Helen to the Task
- Click on the Save and Close icon
Run Task
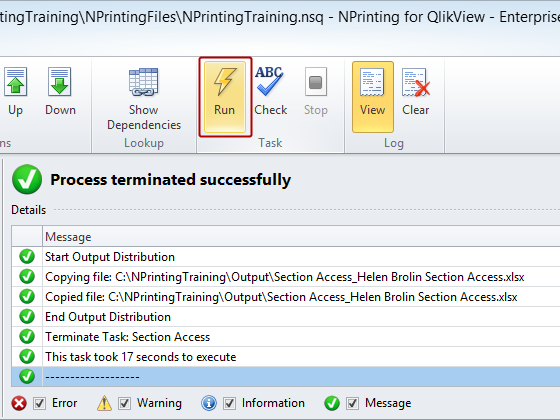
Select the Section Access task in the list and click on the Run icon.
Inspect Log
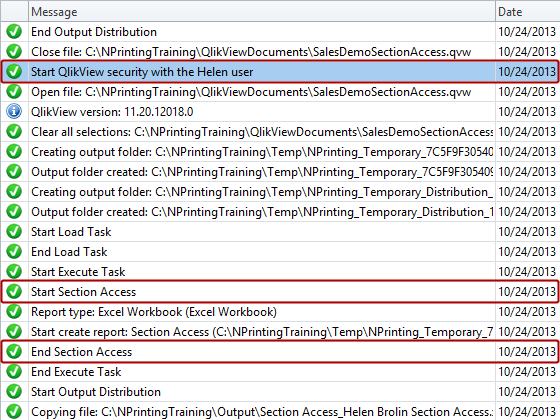
Please note the start of QlikView security with the Helen user, the start of Section Access, and the end of Section Access.
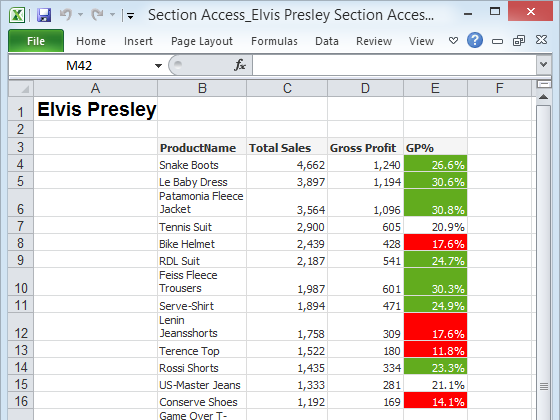
Inspect Elvis Presley Report
Inspect Helen Brolin Report
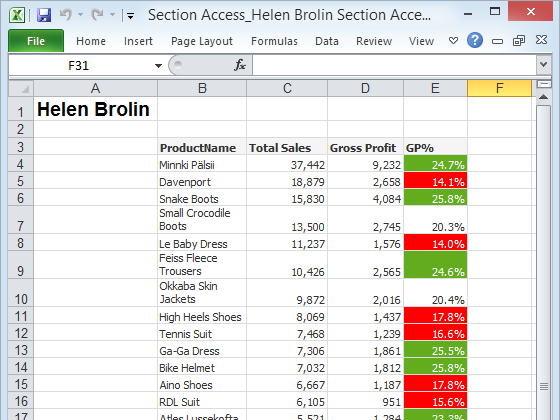
The two reports contain only the data pertinent to the recipient.
- Move Comment
- Delete Comment
- Mark as Read
- Mark as New
- Bookmark
- Permalink
- Report Inappropriate Content
Hi, up at the top it says nt security can't work with this because it checks who is logged in. However, if I am logged in as ab\steve and ab\steve is on the section access list, would there be an angle for nprinting designer on my desktop be able to access that document? Same question if I have ab\nprint on the nprinting server's service account and ab\nprint on the section access list - named cals in place. (I tried just putting ab\steve into the user name box on the connection window, but it gives the connection error when I save and close to create the object list. Same connection works okay when disable the section access list. So I'm sure you're right, just instinct feels like there should be an angle if I'm logged in as me using nprinting designer on my desktop and I'm on the section access list.)
Can you suggest an alternate section access script that would work with nprinting, recognize users, and not require an additional password on accesspoint? (Accesspoint is setup so I'd put ab\steve and a password before I get to the index page, then freely see and access any documents with ab\steve on their section access list.)
Thanks!
Section Access;
LOAD * INLINE [
ACCESS, NTNAME
ADMIN, ab\qlik
ADMIN, ab\steve
ADMIN, ab\nprint
];
Section Application;