Unlock a world of possibilities! Login now and discover the exclusive benefits awaiting you.
- Qlik Community
- :
- Support
- :
- Support
- :
- Knowledge
- :
- Member Articles
- :
- Formulas
- Edit Document
- Move Document
- Delete Document
- Subscribe to RSS Feed
- Mark as New
- Mark as Read
- Bookmark
- Subscribe
- Printer Friendly Page
- Report Inappropriate Content
Formulas
- Move Document
- Delete Document
- Mark as New
- Bookmark
- Subscribe
- Mute
- Subscribe to RSS Feed
- Permalink
- Report Inappropriate Content
Formulas
Formulas provide you with the means to calculate unique values in QlikView and then export them from QlikView into your reports. Formula use in NPrinting will be explored in this tutorial. It is presumed that you are familiar with more the fundamental aspects of Excel template creation using NPrinting. If not, see How to Create Excel Reports and How to Create One or More Levels in Excel Reports.
First of all, formulas must be QlikView formulas, i.e. they must use reserved words as defined for QlikView and according to QlikView syntax. Formulas to be used in NPrinting must evaluate to a unique value. Please notice that =getCurrentSelections() returns a unique string - it's composed by merging the selected values with a separator, but it's a single string so this function is admitted.
The series of formulas that will be created here are simple because the objective is to show how to use them in NPrinting and we do not want to distract your attention from this. The formulas will be employed with and without numerical and time formatting. NPrinting sends the formula to QlikView for evaluation and any numerical or time formatting must be applied by QlikView at the moment of evaluating the formula to its unique value. The value is exported from QlikView with whatever numerical or time formatting that has been applied and will fail to be altered by any attempt to apply similar formatting in the template. The result of using formulas in levels and pages will also be demonstrated.
Add Formula
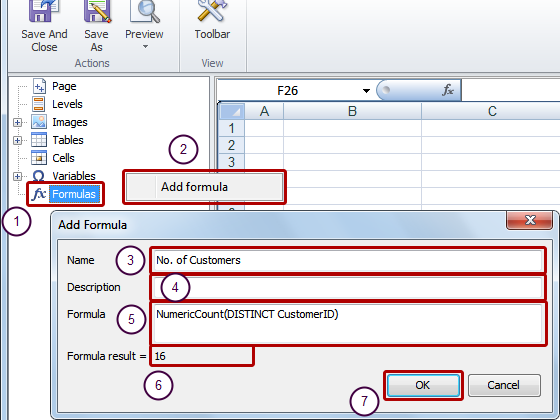
- Right click on the Formulas node
- Select Add formula
- Enter a Name in the Add Formula dialog window
- Enter a Description (Optional)
- Enter your Formula
- You can already see the calculated result
- Click on OK
Add Other Formulas
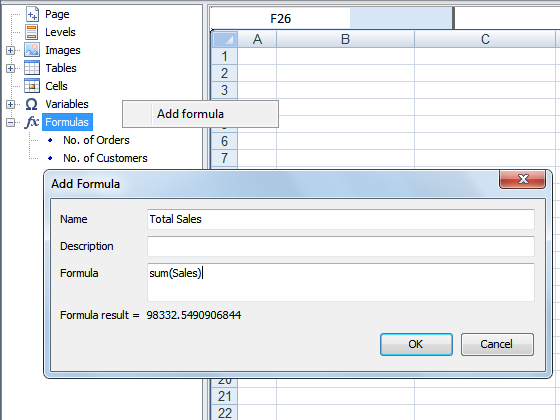
Add as many as you want.
Add Formulas to Template
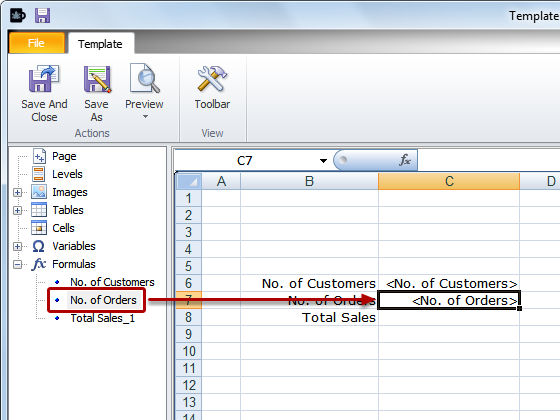
Drag the formula node tokens into the template and drop them onto the appropriate empty cells one at a time.
Preview Your Work
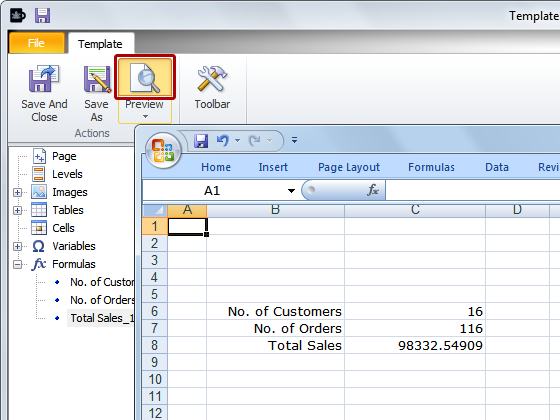
You see the QlikView source formatting when you click on Preview.
Format
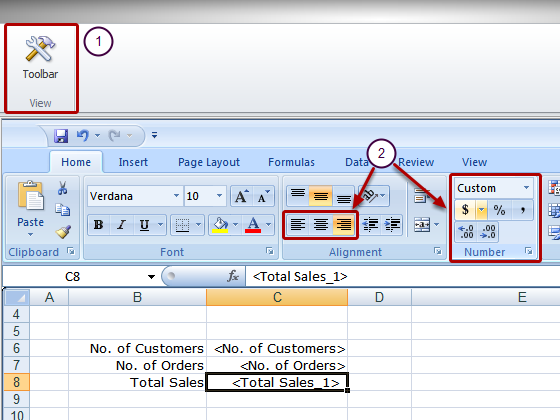
- Click on the Toolbar icon to make the Excel formatting tools appear
- Apply appropriate formatting
Cells containing formulas or variables will appear in your report with formatting from the source until you apply formatting in Excel. They will then appear in your report with the formatting you apply with Excel formatting tools.
Formatting for fields is controlled from the Properties menu of the table or field (see Can I apply Excel formatting to my Excel reports?😞
- If the Keep Source Format box is checked (default), the generated column in your report will appear as in your QlikView document (see How do I keep QlikView formatting in my report?)
- If the Keep Source Format box is unchecked and a format code is entered for the value of Format (see Which formats can I use in columns?), the cell contents will be presented in your report according to the code
- If the Keep Source Format box is unchecked and no format code is entered for the value of Format, the cell contents will be presented in your report in its raw form or according to the formatting you apply with Excel formatting tools
See Effects of Formatting Immediately
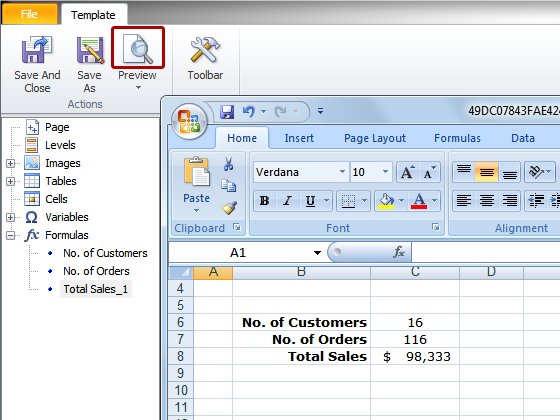
Click on Preview to see the results of the changes you have made, close Excel, adjust your formatting, and preview again until it is just right.
Add a Level
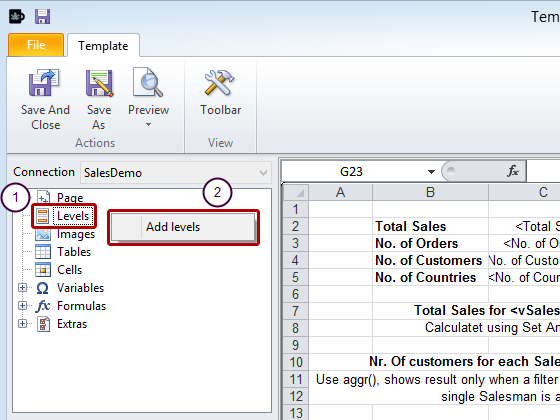
- Right click on the Levels node
- Click on Add levels
Add Level to Template
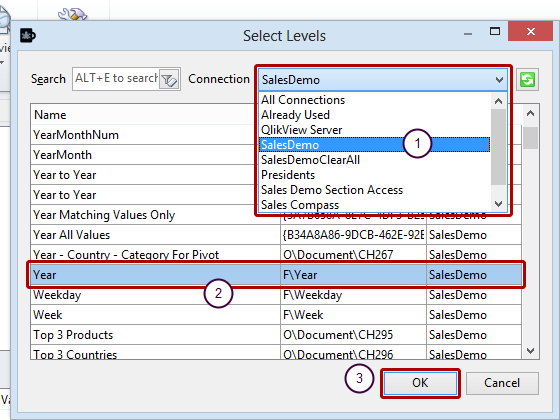
- Select the Connection to the QlikView document containing the object you want to add
- Select Year in the Select level dialog window
- Click on OK
Apply Level to Template
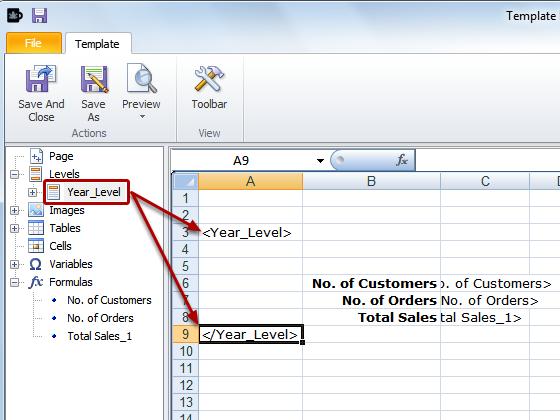
- Drag the Year_Level node token onto a group of three consecutive empty cells in a column that is to the left of or contains the left most element to be contained in the level
- Reposition the <Year_Level> and </Year_Level> so that they are on rows above and below all elements to be included in the level as necessary
The rows containing the level tags will be eliminated during report generation, but leave room for the Year heading we ar going to include.
Add Heading
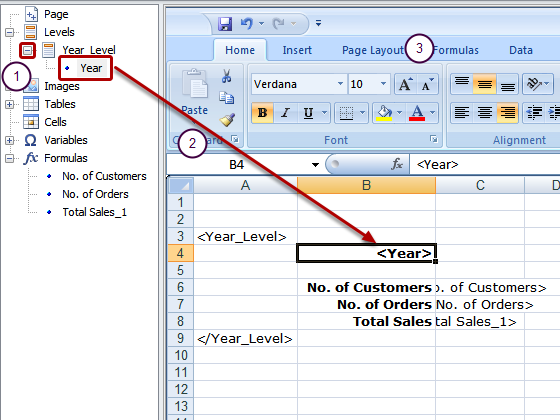
- Expand the Year_Level by clicking on the '+' to its left
- Drag the Year node token into the template and drop it onto an empty cell within the Year_Level range
- Apply formatting from the toolbar
Set Page
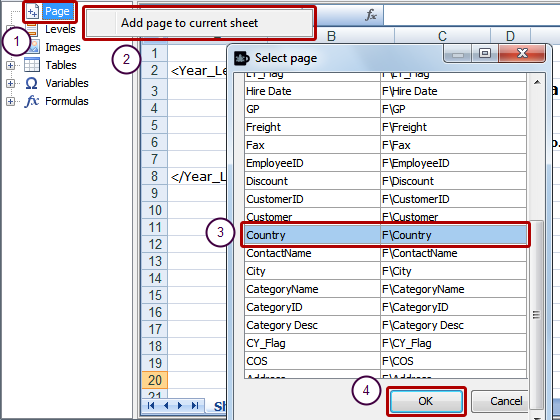
- Right click on the Page node
- Select Add page to current sheet
- Select Country in the Select page dialog window
- Click on OK
Add Title
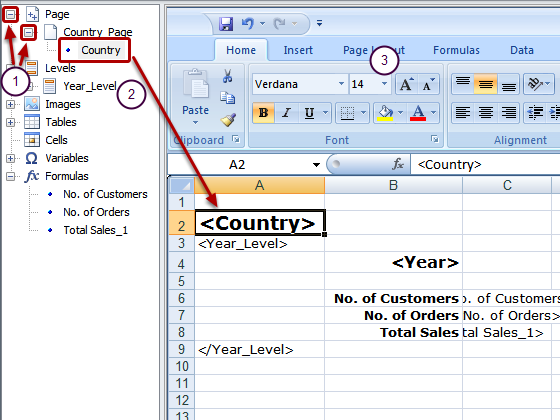
- Expand the Page and Country_Page nodes
- Drag the Country node into the template and drop it onto an empty cell outside of the Year_Level range
- Format to please
Admire Results
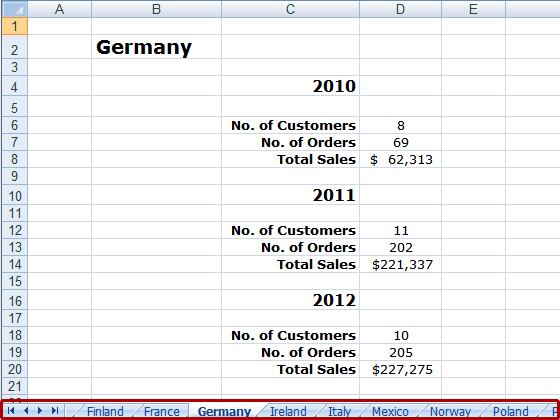
Click on the Preview icon and note that each country has a separate sheet or page.