Announcements
Live today at 11 AM ET. Get your questions about Qlik Connect answered, or just listen in. SIGN UP NOW

How to Create Jobs

cancel
Showing results for 
Search instead for 
Did you mean: 
Bjorn_Wedbratt
Former Employee
Former Employee

How to Create Jobs

Last Update:

Nov 9, 2015 6:42:40 AM

Updated By:

Bjorn_Wedbratt

Created date:

Nov 9, 2015 6:42:40 AM

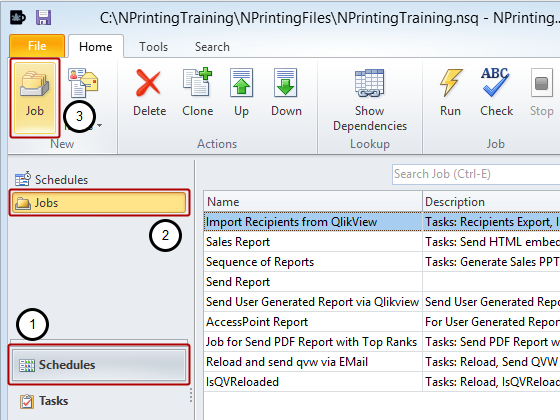
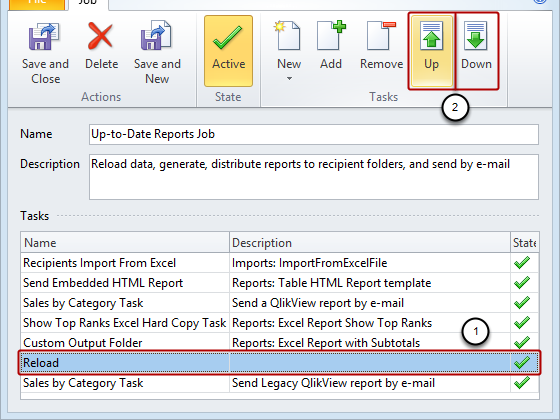
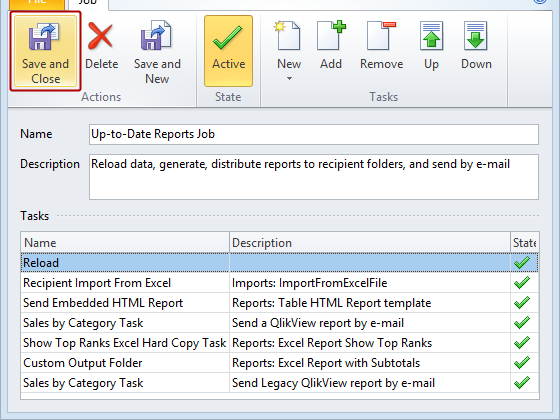
Jobs are lists of tasks which you want to run sequentially, in a specific order. No task begins before the previous has finished. A typical job includes a reload task to update the data in the QlikView document followed by a series of  Report tasks. Tasks run in the order in which they appear in the Job, so be sure to put the Reload task first.

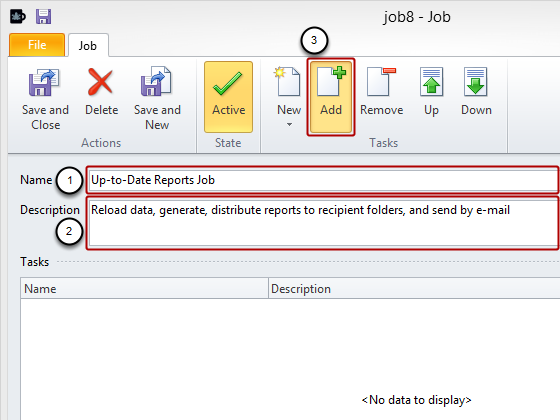
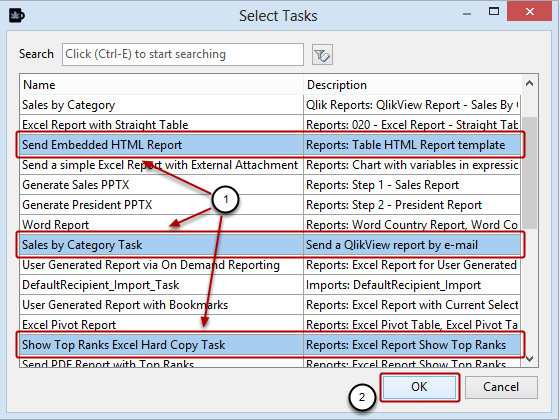
Learn how to create a job and add tasks to it in this tutorial.          


Create New Job

                   
            Create-New-Job.png                   
         
  1. Select the Schedules icon in the lower pane
  2. Select the Jobs icon in the upper pane
  3. Click on the Job icon in the New group of the tool bar


Set Basic Parameters

                   
            Set-Basic-Parameters.png                   
         
  1. Enter a descriptive Name for your job
  2. Enter a more elaborate Description (optionally)
  3. Click on the Add icon


Select Tasks to be Carried Out

                   
            Select-Tasks-to-be-Carried-Out.png                   
         
  1. Select one or more tasks present in the list
  2. Click on the OK button


Re-order Tasks

                   
            Re-order-Tasks.png                   
         
  1. Select a task by clicking on it
  2. Move the task higher or lower on the list by clicking on the Up and Down icons in the Tasks group. Tasks are executed in order from top to bottom. Reload tasks should be at the top and Recipient Import... tasks should generally be second from the top, and so on.


Conclude Task and Ordering

                   
            Conclude-Task-and-Ordering.png                   
         

When you have finished selecting and re-ordering tasks, click on Save and Close.


Labels (1)
Version history
Last update:
‎2015-11-09 06:42 AM
Updated by: