Unlock a world of possibilities! Login now and discover the exclusive benefits awaiting you.
- Qlik Community
- :
- Support
- :
- Support
- :
- Knowledge
- :
- Member Articles
- :
- How to Distribute Reports after Successful .qvw Re...
- Edit Document
- Move Document
- Delete Document
- Subscribe to RSS Feed
- Mark as New
- Mark as Read
- Bookmark
- Subscribe
- Printer Friendly Page
- Report Inappropriate Content
How to Distribute Reports after Successful .qvw Reload on a QlikView Server with Publisher
- Move Document
- Delete Document and Replies
- Mark as New
- Bookmark
- Subscribe
- Mute
- Subscribe to RSS Feed
- Permalink
- Report Inappropriate Content
How to Distribute Reports after Successful .qvw Reload on a QlikView Server with Publisher
Nov 4, 2015 10:58:43 AM
Nov 4, 2015 10:58:43 AM
To execute this tutorial you must have QlikView Server and Publisher installed and running. You need also NPrinting Server. Of course, you need related licenses.
In this tutorial you'll learn how to schedule the reload of a .qvw in QlikView Server and then distribute reports based on it by using NPrinting only if the reload finished successfully.
This is an advanced tutorial that requires a good knowledge about developing solutions using NPrinting. We'll use examples from the NPrinting Training environment.
Configure your source documents
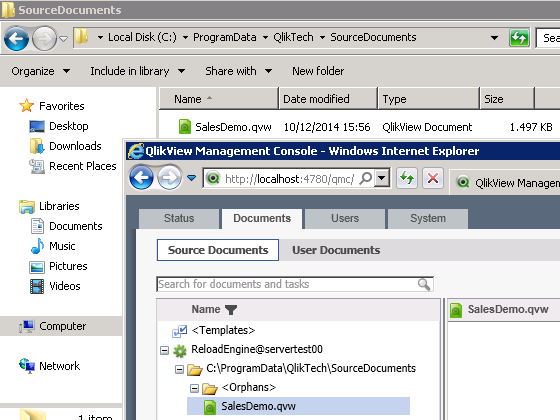
- Copy SalesDemo.qvw in the Source Documents folder (for instance C:\ProgramData\QlikTech\SourceDocuments)
- Log in the QMC (QlikView Management Console) and you'll see the .qvw in the "Source Documents" tab under "Documents"
Create a QlikView Server Reload Task
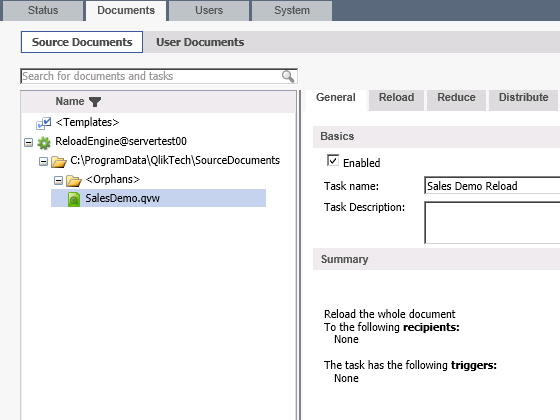
- Click on the green "+" (plus) symbol on the upper right corner of the QMC to add a task
- Insert "Sales Demo Reload" as name.
Distribute the Reloaded Document to a Folder
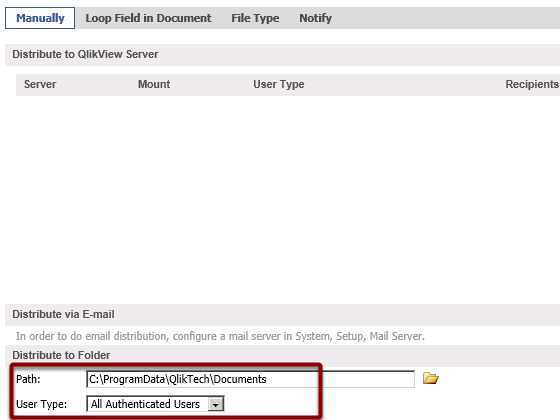
In the "Distribute" tab set C:\ProgramData\QlikTech\Documents as distribute folder and select "All Authenticated Users" in the drop-down menu. Use this document in the source connection of the NPrinting project.
Trigger the Reload
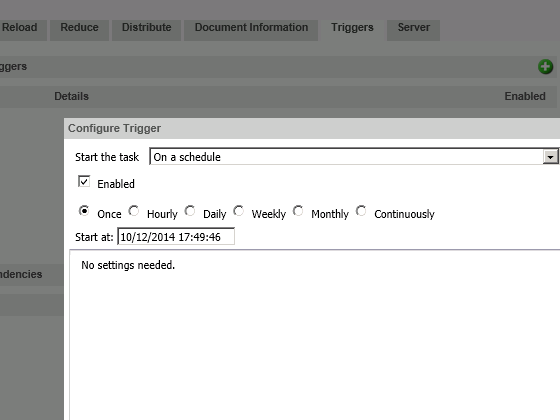
- Open the "Triggers" tab
- Create a schedule based trigger
- Confirm by pressing "Apply" and try to manually run the trigger to be sure that everything is ok
Set NPrinting Service to Accept External Requests
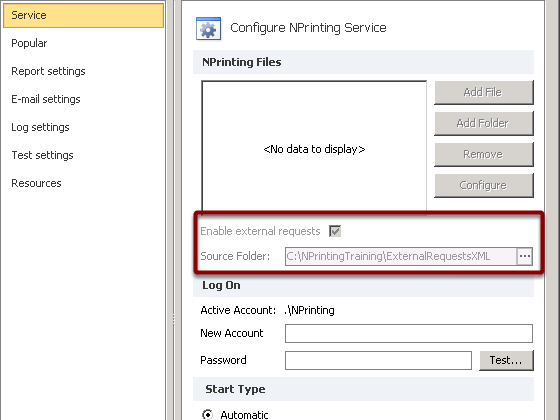
- Open the NPrinting Management Console
- Enable the external requests flag
- Insert the Source Folder. For instance C:\NPrintingTraining\ExternalRequestsXML
- Start the NPrinting Service
It's very important that you know the tutorial "How to Execute NPrinting Reports by External XML" Request very well.
Create the External Request File
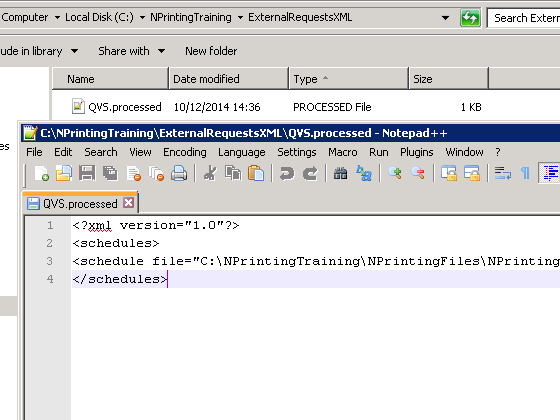
In the folder C:\NPrintingTraining\ExternalRequestsXML create the text file QVS.processed. The code to insert is:
<?xml version="1.0"?>
<schedules>
<schedule file="C:\NPrintingTraining\NPrintingFiles\NPrintingTraining.nsq" type="job" entityName="Send a Report via Email" />
</schedules>
This will run the job "Send a Report via Email" that must be present in the .nsq file. To create a job refer to "How to Create Jobs"
Create the Batch File
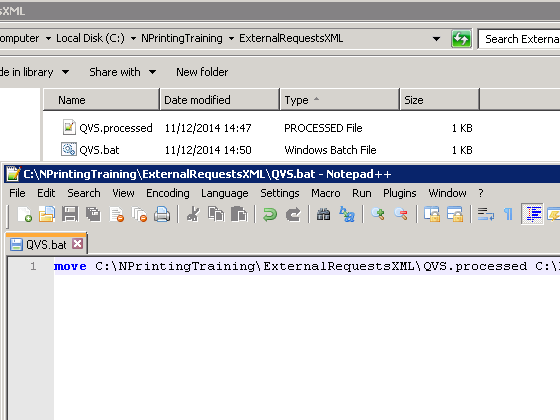
In the folder C:\NPrintingTraining\ExternalRequestsXML create the file QVS.bat with the code:
move C:\NPrintingTraining\ExternalRequestsXML\QVS.processed C:\NPrintingTraining\ExternalRequestsXML\QVS.requestIt will rename the QVS.processed file to QVS.request. When the NPrinting Server find a .request file in the External Requests folder it will execute it.
Open the External Program in QlikView Server

- Select the "System" tab
- Click on "Supporting Tasks"
- Activate the "External Program" folder
Click on the green "+" (plus symbol) button on the right corner to create a new task
Create a new Task
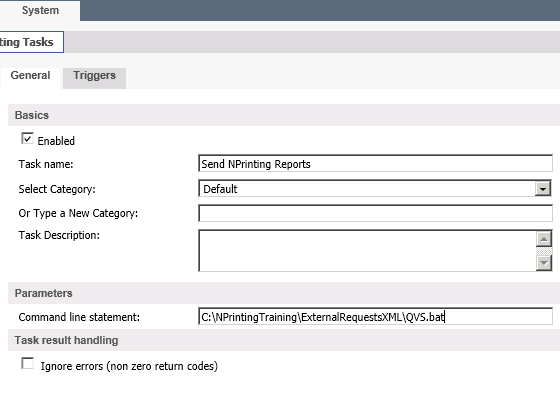
- Set "Send NPrinting Reports" as task name
- In the "Command line statement" insert C:\NPrintingTraining\ExternalRequestsXML\QVS.bat.
When activated this task will run the script we saved in QVS.bat
Trigger the Task
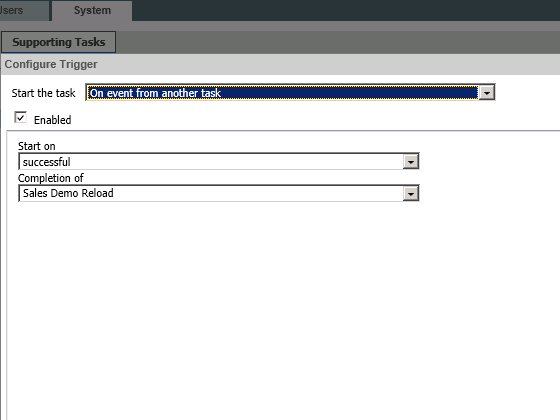
- Click on the green "+" (plus symbol) button to create a new trigger
- In the Start the task drop-down menu select "On event from another task"
- Set "successful" on Start on
- On Completion of set "Sales Demo Reload"
In this way you'll trigger the task to start after the finish of the reload and only if it ended successfully. This task runs the QVS.bat file who rename QVS.processed to QVS.request so NPrinting Server starts to distribute the reports.
- Move Comment
- Delete Comment
- Mark as Read
- Mark as New
- Bookmark
- Permalink
- Report Inappropriate Content
I have not implemented it yet. We try to write a powershell-script to execute it because our Servers run on Windows server 2012 R2 Standard
- « Previous
-
- 1
- 2
- Next »