Unlock a world of possibilities! Login now and discover the exclusive benefits awaiting you.
- Qlik Community
- :
- Forums
- :
- Forums by Product
- :
- Products (A-Z)
- :
- Qlik Sense
- :
- Documents
- :
- Configuring Qlik Sense Server to JWT Auth
- Edit Document
- Move Document
- Delete Document
- Subscribe to RSS Feed
- Mark as New
- Mark as Read
- Bookmark
- Subscribe
- Printer Friendly Page
- Report Inappropriate Content
Configuring Qlik Sense Server to JWT Auth
- Move Document
- Delete Document and Replies
- Mark as New
- Bookmark
- Subscribe
- Mute
- Subscribe to RSS Feed
- Permalink
- Report Inappropriate Content
Configuring Qlik Sense Server to JWT Auth
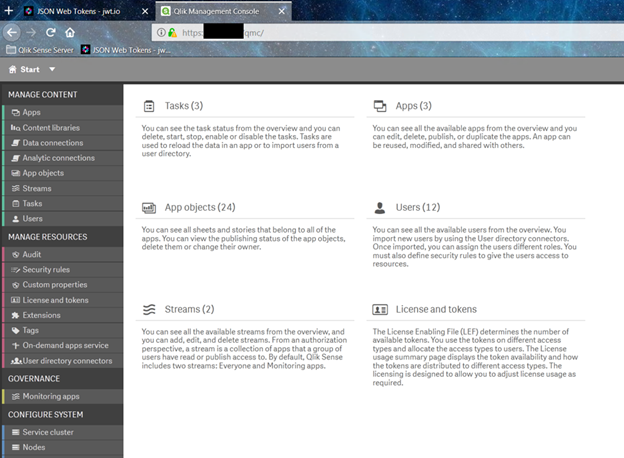
- Login into QlikSense Management Console
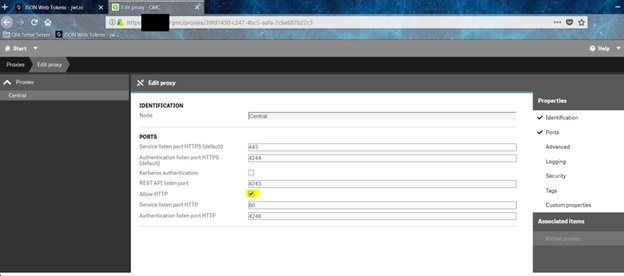
- Optionally, configure the existing Central proxy to allow for HTTP connections also.
- Head over the MMC to view the certificates, and add the Certificates snap in for local computer as well as current user.
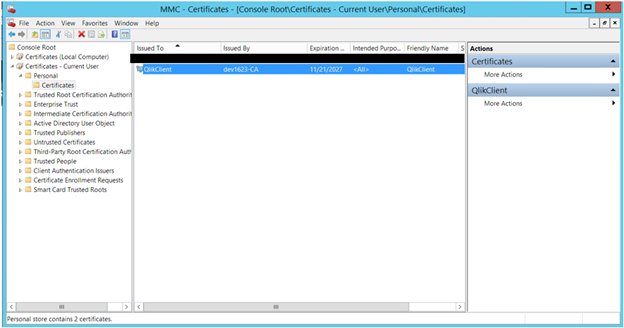
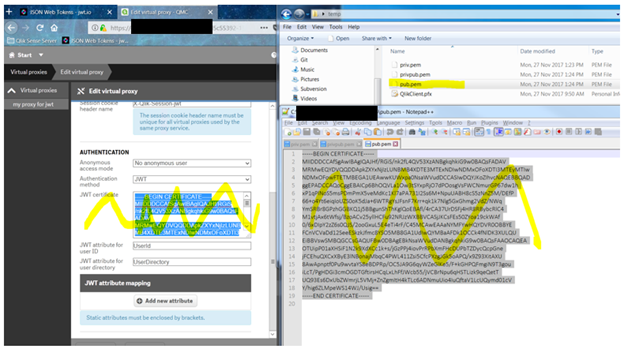
- Pick the certificate you inserted, or the one Qlik created when starting up. For simplicity, I used the one Qlik created. Open the certificate, and copy the thumbprint text, and save it. It would be used down the line.

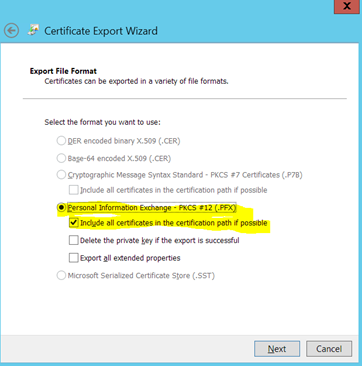
- Export the certificate, with all keys.
- Install OpenSSL.
- Place the exported certificate in a separate folder.
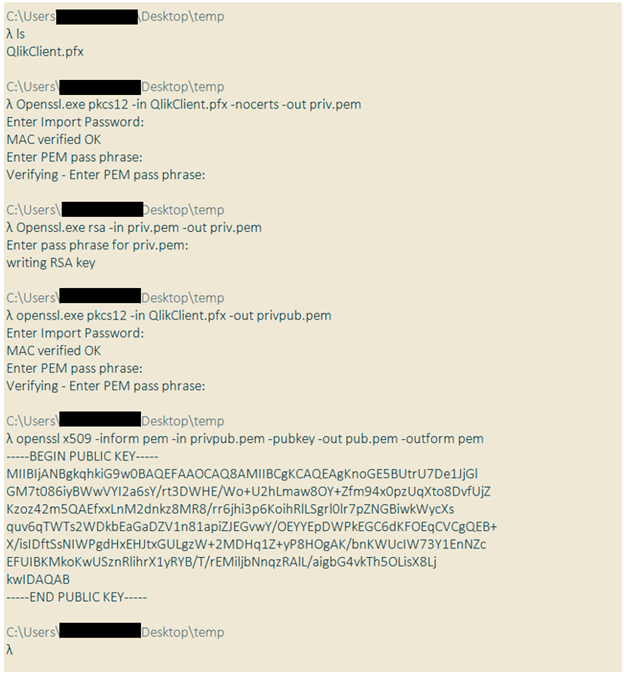
- Execute the below commands in a command prompt (in the folder).
- openssl.exe pkcs12 -in QlikClient.pfx -nocerts -out priv.pem
- openssl.exe rsa -in priv.pem -out priv.pem
- openssl.exe pkcs12 -in QlikClient.pfx -out privpub.pem
- openssl x509 -inform pem -in privpub.pem -pubkey -out pub.pem -outform pem
- Copy the public key to a text file to be used later.
- Execute the below commands in a command prompt (in the folder).
- Head over to Virtual Proxies screen. Click on “Create New” and fill in the details. Be careful about the case, especially when filling in attributes.
- Identification
- Authentication
- Anonymous access mode: No anonymous user
- Authentication mode: JWT
- JWT certificate: In the folder we used in step 7 above, open the file pub.pem in notepad or similar application, copy the entire text, and paste the same in the text area.
- JWT attribute for user ID: UserId
- JWT attribute for user directory: UserDirectory
- Click on Load Balancing and add the Server to be used by this proxy.

- Click Apply and save the new virtual proxy.
- By the end of this step, the virtual proxy screen should show our newly created proxy created, and linked to proxy service.

- Head to the users section in QMC, and create/select the user we wish to use with the proxy we created to test if it works as intended.
- Make a note of the user id, user directory, and any assigned roles.

- Make a note of the user id, user directory, and any assigned roles.
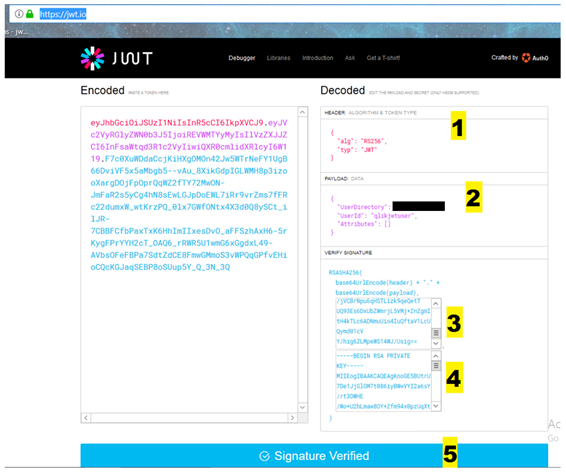
- Open browser window, and open the site https://jwt.io
- Segment 1: leave as is
- Segment 2: Update userid, user directory, and any attributes of the user (optional)
- Segment 3: Paste the public key or the certificate contents
- Segment 4: Paste the private key (this is only for testing the generated key)
- Segment 5: Make sure that this says “Signature verified”. If this shows otherwise, make necessary changes in the above segments.
- Install any tool to place requests to Qlik Sense server. I am using Postman.
- Open postman (or any tool that supports placing requests).
- Set the request to GET
- Paste the server url (ensure you have /jwt between server and target page).
- https://<server>/jwt/sense/app/<app id>
- Click on Headers
- Add a new header – Authorization
- Under the value enter as below
- Bearer <space> <encoded value from step 11 above>
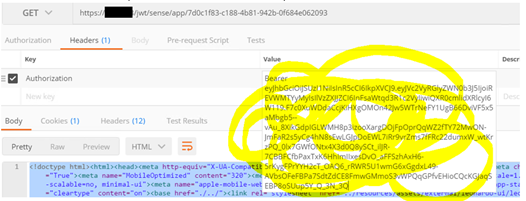
- Bearer <space> <encoded value from step 11 above>
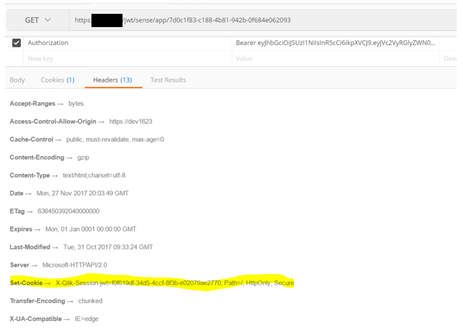
- To ensure it is all working fine, verify the following:
- The response should not show a error 401, and/or a qlik page saying authentication failed at proxy.
- Ensure the response headers show valid values, and the body portion has valid HTML/data.
- That's it!
- Move Comment
- Delete Comment
- Mark as Read
- Mark as New
- Bookmark
- Permalink
- Report Inappropriate Content
It is possible to configure an Authentication module redirect URI for JWT?

- Move Comment
- Delete Comment
- Mark as Read
- Mark as New
- Bookmark
- Permalink
- Report Inappropriate Content
Hi there,
we are facing the same issues (401-Http code: 401) as soon as the token is invalid.
Unfortunately there is no redirection and therefore there is no access except of a cache clearing.
Is there a solution or workaround?
Thank you and BR
Jörg
- Move Comment
- Delete Comment
- Mark as Read
- Mark as New
- Bookmark
- Permalink
- Report Inappropriate Content
Hi @sri_c003 , great article and thank your for sharing.
I followed every step, very carefully but I am still getting HTTP Error 400.
What could it be?
My environment: Qlik Sense Enterprise April/2020 under Windows Server 2016
- Move Comment
- Delete Comment
- Mark as Read
- Mark as New
- Bookmark
- Permalink
- Report Inappropriate Content
@patrickalexsilvaThe document is about 3 years old; and not keeping up with latest developments on NPrinting front.
- Move Comment
- Delete Comment
- Mark as Read
- Mark as New
- Bookmark
- Permalink
- Report Inappropriate Content
@flanfranco and @jpar0511 , did you all ever find a solution to your issue of getting a 401 error after the token is invalid.
Thanks
- « Previous
-
- 1
- 2
- Next »