Unlock a world of possibilities! Login now and discover the exclusive benefits awaiting you.
- Qlik Community
- :
- Support
- :
- Support
- :
- Knowledge
- :
- Member Articles
- :
- How to Use Linked Fields with Keep All Values
- Move Document
- Delete Document
- Subscribe to RSS Feed
- Mark as New
- Mark as Read
- Bookmark
- Subscribe
- Printer Friendly Page
- Report Inappropriate Content
How to Use Linked Fields with Keep All Values
- Move Document
- Delete Document
- Mark as New
- Bookmark
- Subscribe
- Mute
- Subscribe to RSS Feed
- Permalink
- Report Inappropriate Content
How to Use Linked Fields with Keep All Values
Nov 6, 2015 8:47:49 AM
Nov 6, 2015 8:47:49 AM
Get an understanding of the basic NPrinting Multidoc concept by executing the tutorial “How to Create a Simple Excel Report with Objects from Multiple QlikView Documents“ before starting with this one.
Linked Fields is a new entity type that enables linking fields from more than one connected QlikView document. Each Linked Fields entity can link only one field from any connected QlikView document, but from as many as you like. When configuring a Linked Fields entity, you must specify whether you want to "Keep all values" or "Keep all matching values only". Selecting "Keep all values" causes NPrinting to create and use the union of the data sets for the fields that are linked. Selecting "Keep all matching values only" causes NPrinting to create and use the intersection of the data sets for the fields that are linked, i.e. only those values that are present in each and every linked field in the QlikView documents connected to a specific report. Linked fields can be used with Filters, Levels, Pages and Cycles.
Open New Linked Fields Window
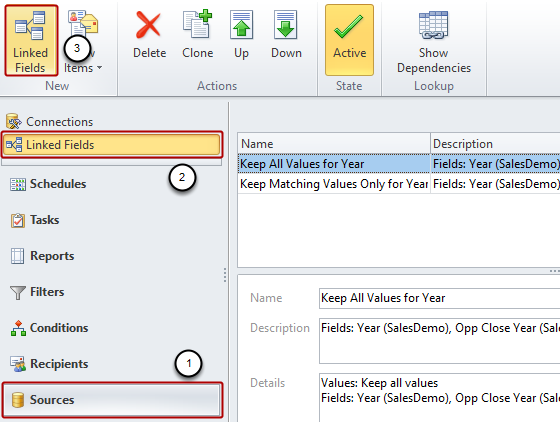
- Select Sources in the lower left pane
- Select Linked Fields in the upper left pane
- Click on the Linked Fields icon in the New group
Give Identity to LinkedFields Object
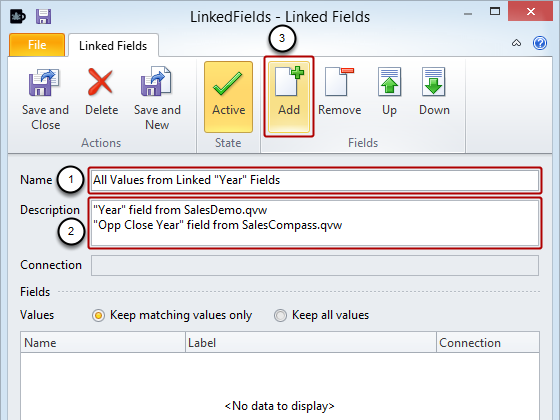
- Enter All Values from Linked "Year" Fields for your LinkedFields object Name
- Enter a Description (optional)
- Click on the Add icon
Add One or More Fields from First Connection
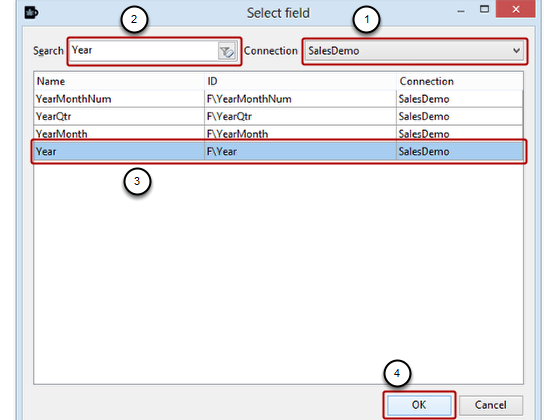
- Select SalesDemo as the Connection if it is not already selected, it may take a minute for QlikView to load the document and transmit to this window
- Enter a key word to facilitate finding the field you want, Year in this case
- Select the Year field
- Click on the OK button
Add One or More Fields from Another Connection
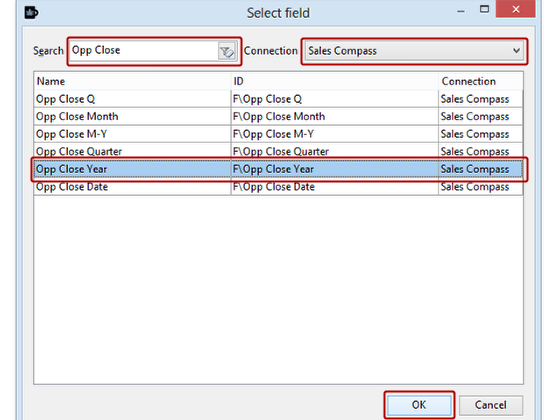
Open the Select field window again then by clicking on the Add icon:
- Select Sales Compass as the Connection, the list may take some time to appear if this is the first use of this connection and the document is large.
- Enter key words to facilitate finding the field you want, Opp Close Year in this case
- Select the Opp Close Year field
- Click on the OK button
Save Your LinkedFields Object
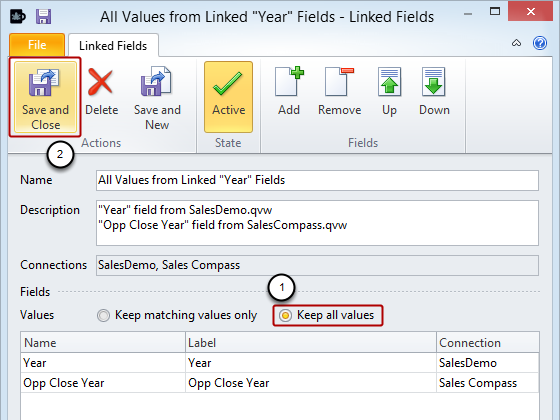
- Make sure that Keep all values has been selected for Values. This will form the union of the data sets in these linked fields
- Click on the Save and Close icon
Select and Clone Excel Report
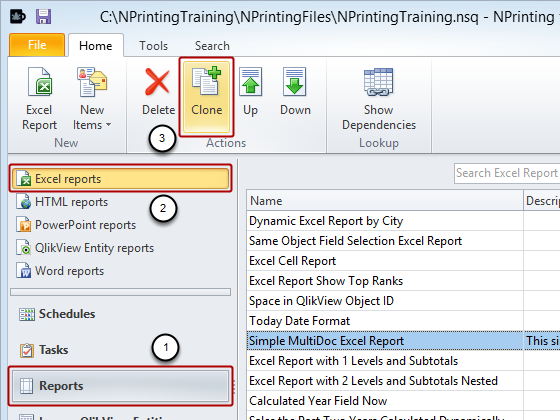
- Select Reports in the lower left pane
- Select Excel reports in the upper left pane
- Click on the Clone icon
Open "Simple MultiDoc Excel Report" Clone
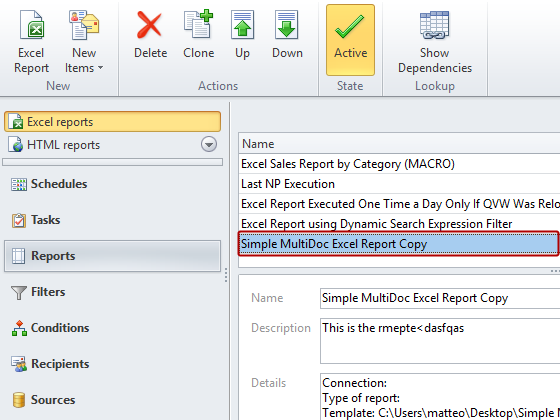
Double click on Simple MultiDoc Excel Report Copy, which you'll find at the bottom of the list, to open the Excel Report window.
Re-Identify Report
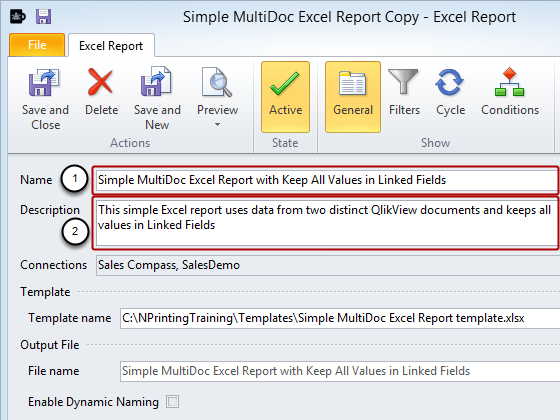
- Add "with Keep All Values in Linked Fields" to the Name
- Adapt the Description if there is one
Open Report in Template Editor
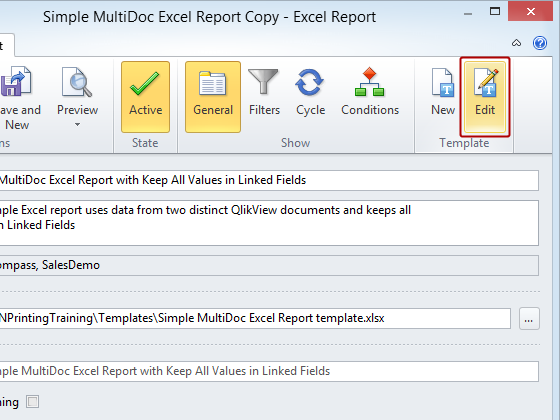
Click on Edit in the Template group of the tool bar
Add Level to Template
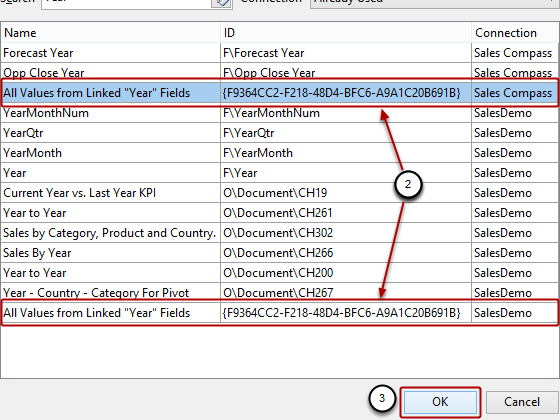
- Open the Select Levels window by right clicking on the Levels node and clicking on the Add levels button (see: )
- Select either of the All Values from Linked "Year" Fields. They are equivalent since they are linked.
- Click on the OK button
Linked fields can be selected for:
- Cycles
- Levels
- Pages
- Filters
Embed 'All Values from Linked "Year" Fields' Level in Template
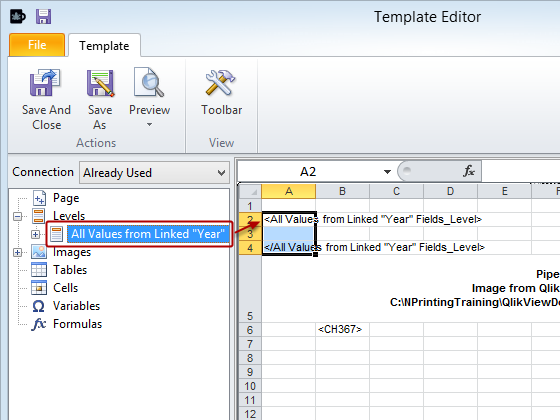
Drag and drop the All Values from Linked "Year" Fields level node token into the template onto cell A2. It will expand to become two tags, one start and one end.
Redefine Level Range
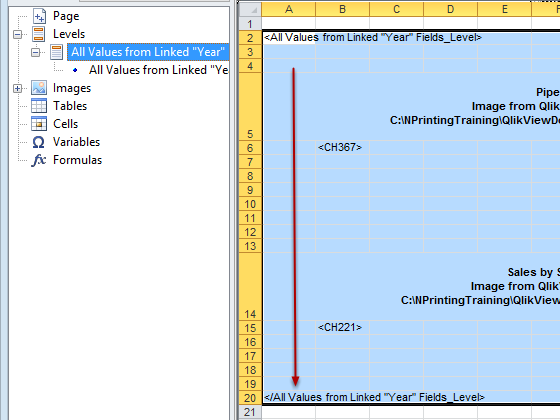
Reposition the </All Values from Linked "Year" Fields_Level> tag to cell A20, redefining the level range so that it includes both charts and their headings.
Embed Heading
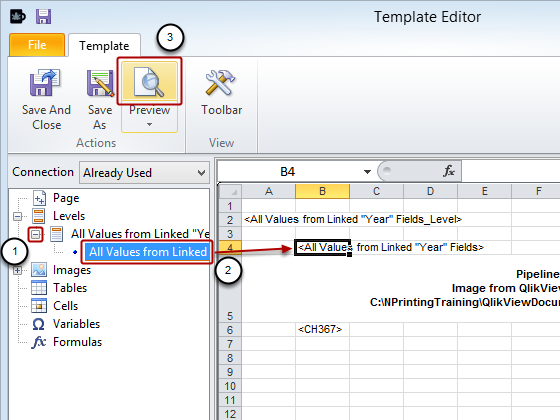
- Expand the All Values... level node by clicking on the '+' to its left
- Drag the All Values... name node into the template and drop it on cell B4
- Click on the Preview icon
Inspect MultiDoc Report
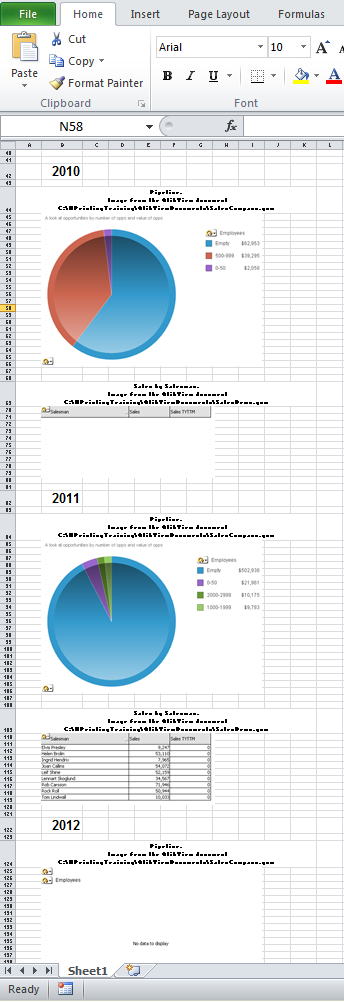
The report displays charts from 2009 to 2013. These years are in at least one of the two connected QlikView documents. An empty chart means that the associated connected QlikView document has no data for the selected year
Save Your Template
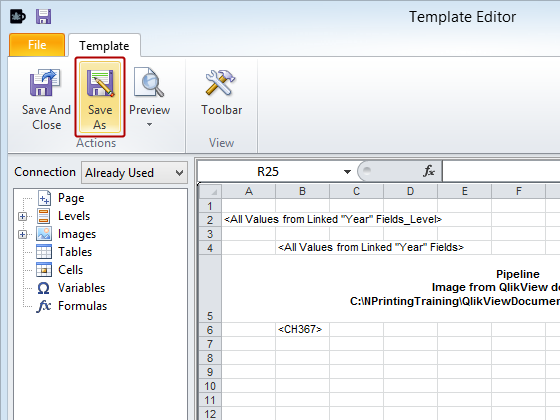
Click on the Save As icon.
Rename and Save
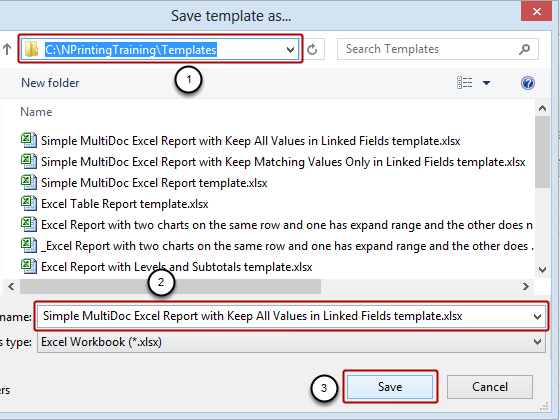
- Make sure you are saving to C:\NPrintingTraining\Templates
- Rename the template to Simple MultiDoc Excel Report with Keep All Values in Linked Fields template.xlsx
- Click on the Save button
Close Template Editor
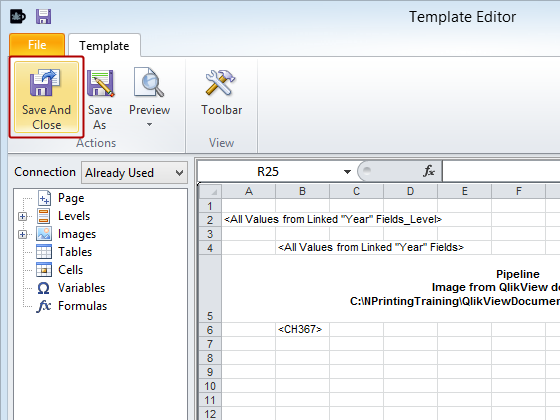
Click on the Save and Close icon.
Save Your MultiDoc Report

Click on the Save and Close icon to save your Excel MultiDoc report.
Now we suggest that you execute the third tutorial of this series, “How to Use Linked Fields with Keep All Matching Values Only”, to see the difference between the options “Keep all values” and “Keep matching values only”.