Unlock a world of possibilities! Login now and discover the exclusive benefits awaiting you.
- Qlik Community
- :
- All Forums
- :
- QlikView App Dev
- :
- Re: SAS ODBC Connection
- Subscribe to RSS Feed
- Mark Topic as New
- Mark Topic as Read
- Float this Topic for Current User
- Bookmark
- Subscribe
- Mute
- Printer Friendly Page
- Mark as New
- Bookmark
- Subscribe
- Mute
- Subscribe to RSS Feed
- Permalink
- Report Inappropriate Content
SAS ODBC Connection
Hi,
I'm trying to connect to a SAS dataset. I've been able to install the SAS ODBC driver and can see it as a connection option in QlikView but am getting the below error.
Connection Test Failed
SQL##f - SqlState: IM003, ErrorCode: 160, ErrorMsg:
Specified driver could not be loaded due to system error 126: The
specified module could not be found. (SAS, C:\Program
Files\SASHome2\SASDriversforODBC\9.43\sasdrv32.dll).
I checked for the file and it appears to be at that location.
Any thoughts on where I'm going wrong would be much appreciated.
Rgds
Jenny
- Tags:
- qlikview_scripting
- Mark as New
- Bookmark
- Subscribe
- Mute
- Subscribe to RSS Feed
- Permalink
- Report Inappropriate Content
Hi Jenny,
I am coming across the exact same problem while using the 64-bit version of SAS ODBC driver and connecting to 64 bit Qlikview. Did you find a resolution to this issue ? Please let me know.
Thanks,
Puneet.
- Mark as New
- Bookmark
- Subscribe
- Mute
- Subscribe to RSS Feed
- Permalink
- Report Inappropriate Content
Hi Jenny, Punnet,
Have you resolved that issue? If yes can you please share it?
I am trying to connect to a SAS and I am facing that same error.
Best regards,
Jorge Brugos
- Mark as New
- Bookmark
- Subscribe
- Mute
- Subscribe to RSS Feed
- Permalink
- Report Inappropriate Content
Hi all,
My Problem seems to be that the ODBC driver is not compatible with MS 2012 R2, since we are able to run it successfully on Windows 8.
Kind regards,
Jorge Brugos
- Mark as New
- Bookmark
- Subscribe
- Mute
- Subscribe to RSS Feed
- Permalink
- Report Inappropriate Content
Hi all,
The latest version of SAS 9.4 ODBC do not run with Qlikview server x64 2012 R2.
You have to download the following version here : http://support.sas.com/downloads/package.htm?pid=1276
Uninstall the current version before install the new one the reboot server.
Regards
Jean-Yves Corre
- Mark as New
- Bookmark
- Subscribe
- Mute
- Subscribe to RSS Feed
- Permalink
- Report Inappropriate Content
hello, with odbc driver gives many problems try the oledb you have to do is:
Sas install on your local machine
Install the driver oledb
Server name and port to which you are connecting SAS
Names of tables or libraries where you will extract the information
Since you have everything you need to request access to the tables that you need because they have an owner.
And then you can make the connection as you will ask these data.
I show the steps of the connection , I hope they serve
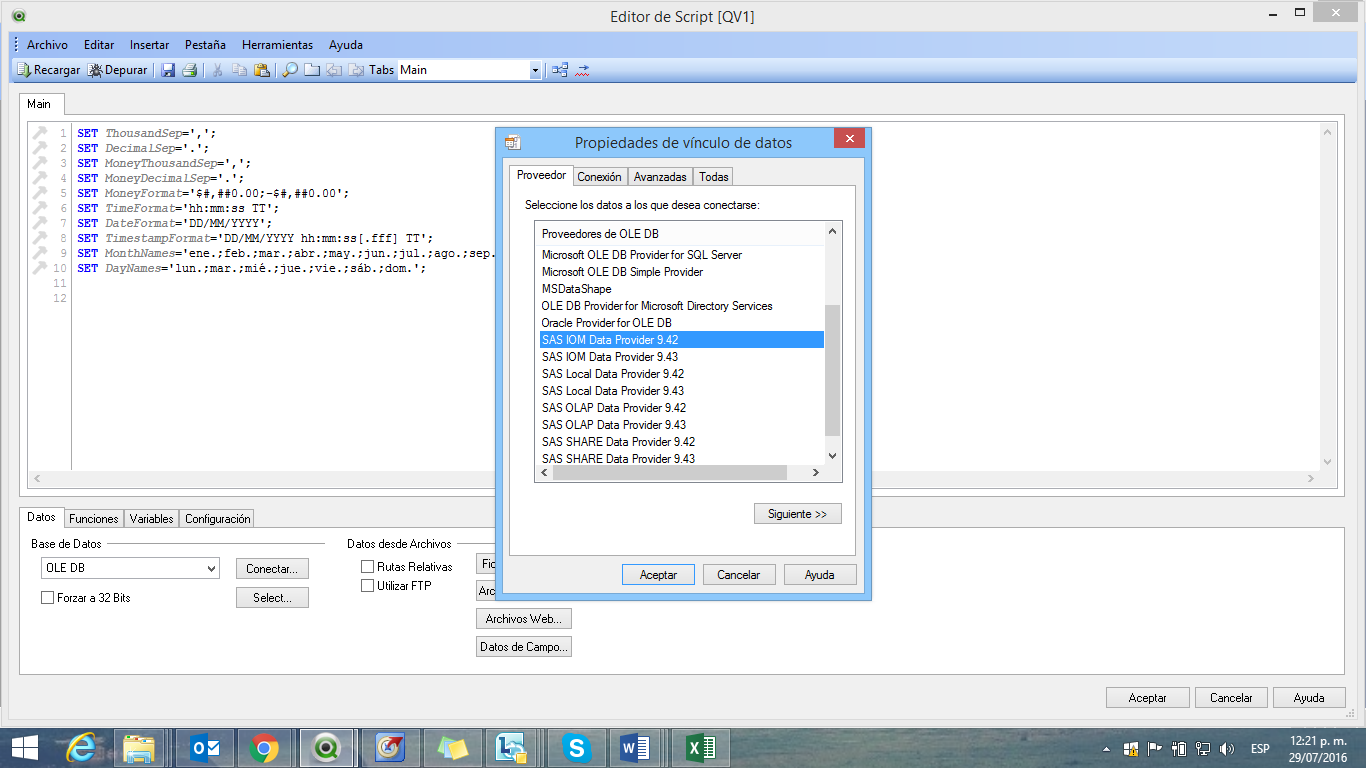
Select the connector SAS IOM Data Provider 9.42
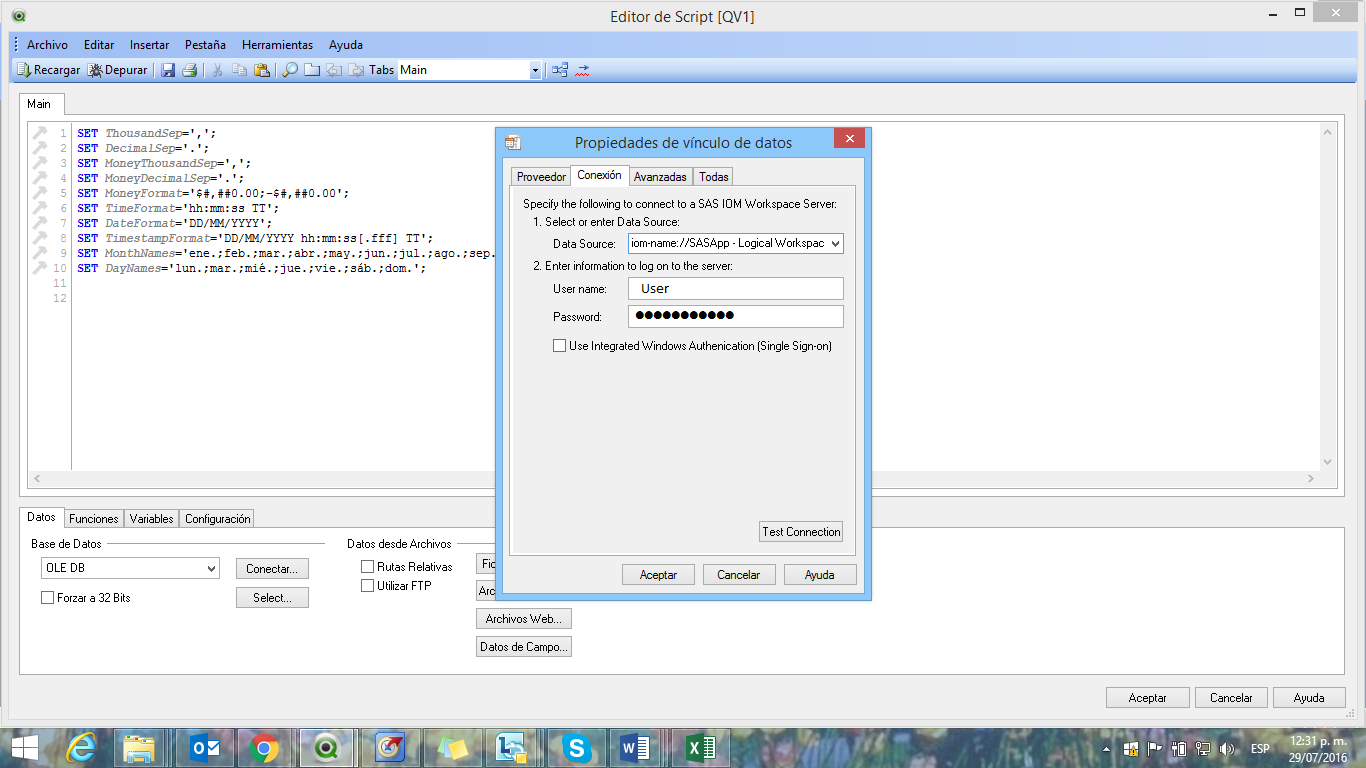
Then we click Next and proceed to the connecting flange in which we enter the following data:
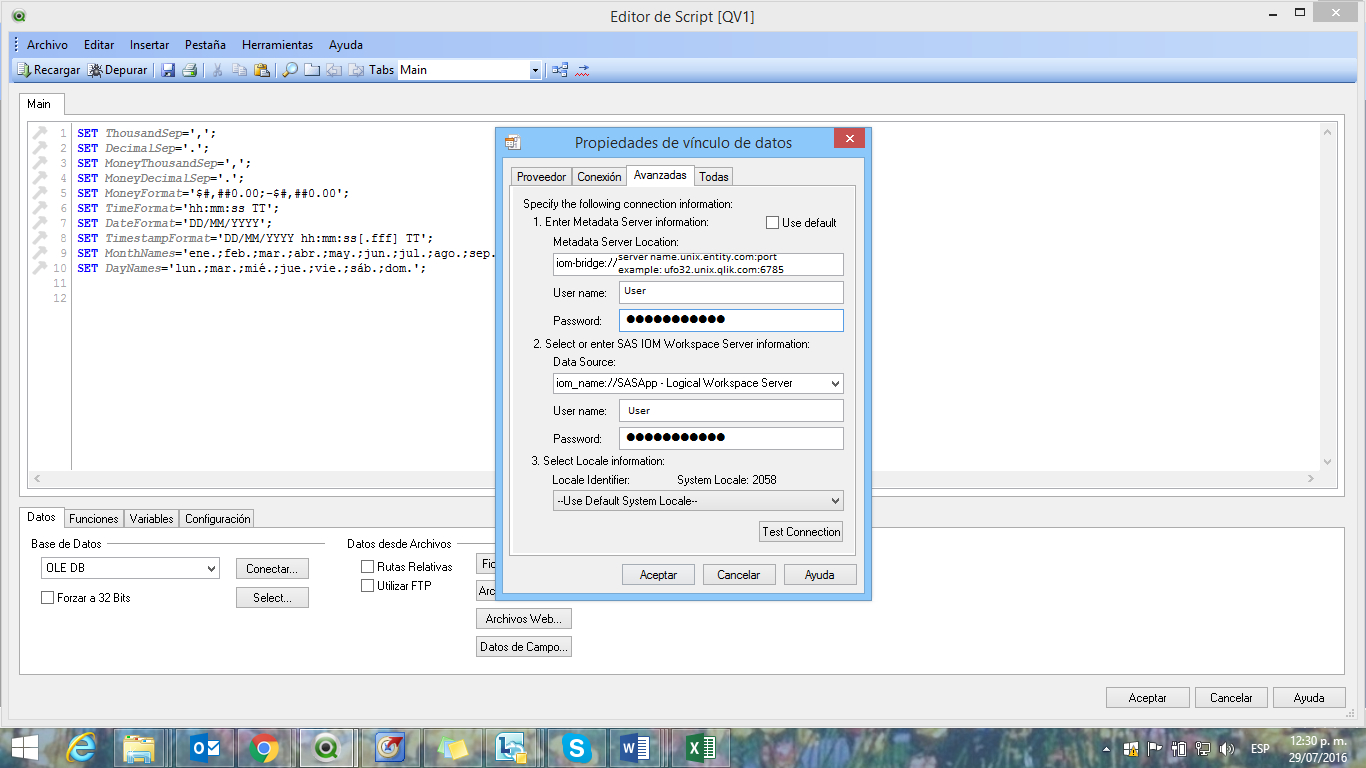
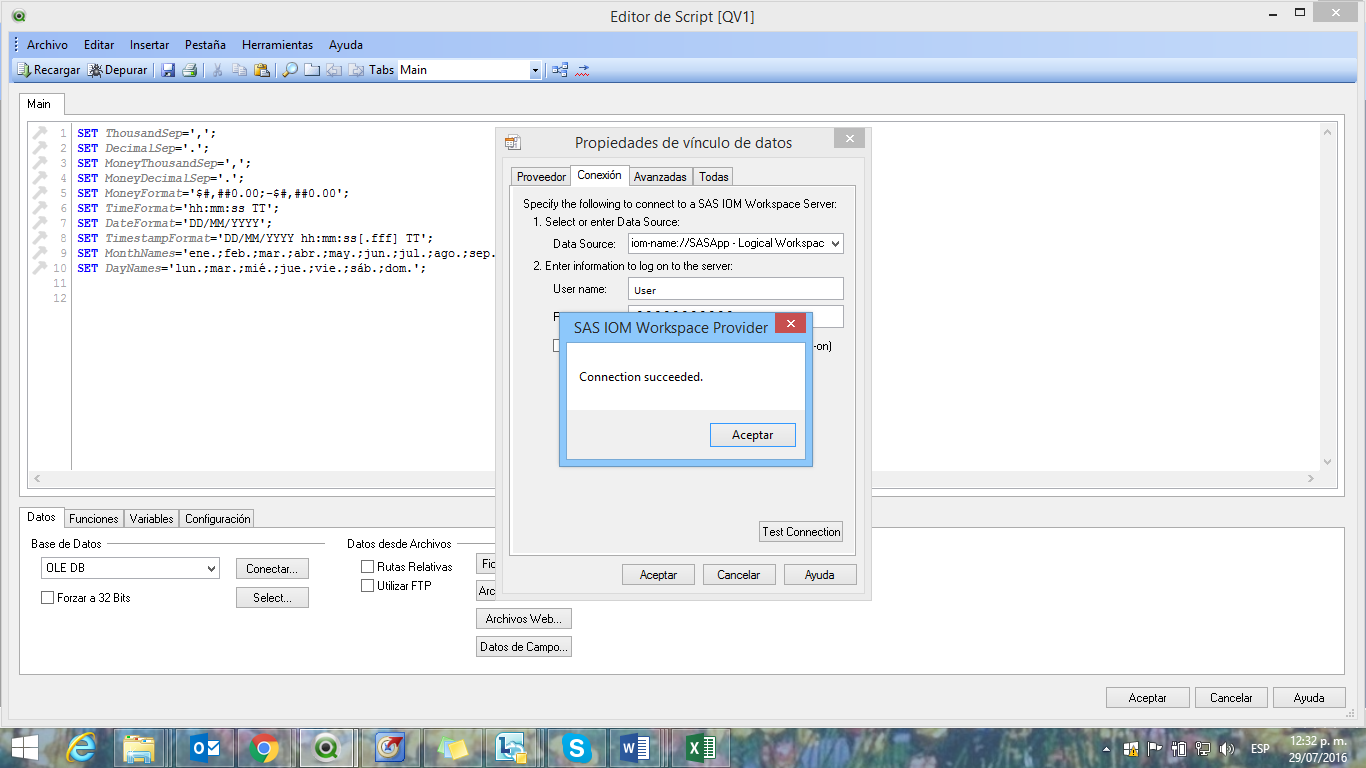
We spent the next Advanced tab , we disable the default use palomita and then entered the following data is the server name and port
We click on Test Connection and appears to us that the connection was successful :
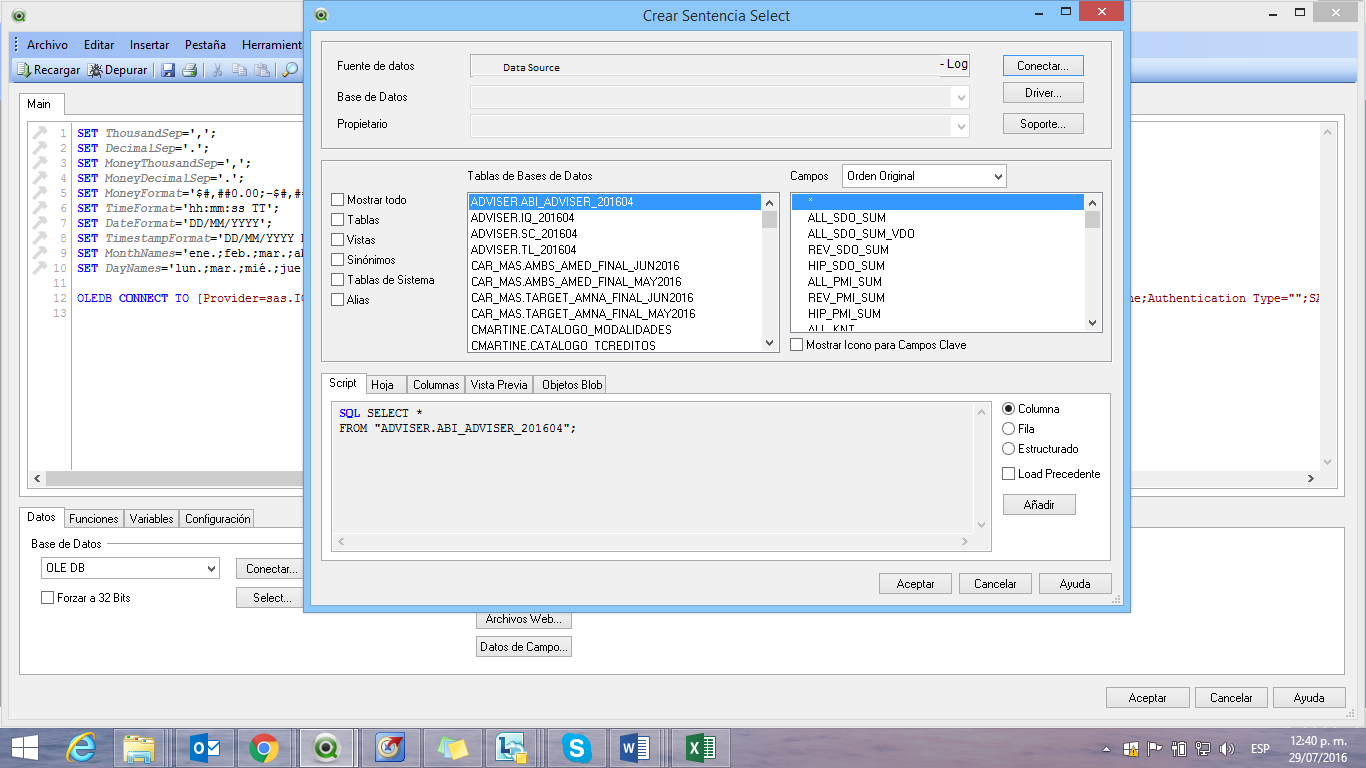
We click on Select and we appear the tables you have access :