Unlock a world of possibilities! Login now and discover the exclusive benefits awaiting you.
- Qlik Community
- :
- Blogs
- :
- Technical
- :
- Design
- :
- Navigating through Qlik Sense Desktop
- Subscribe to RSS Feed
- Mark as New
- Mark as Read
- Bookmark
- Subscribe
- Printer Friendly Page
- Report Inappropriate Content
I am sure everyone has already downloaded Qlik Sense Desktop, so I wanted to help you get comfortable with navigating within an application. Understanding how to get to where you want to go is half of the battle.
Top left navigation
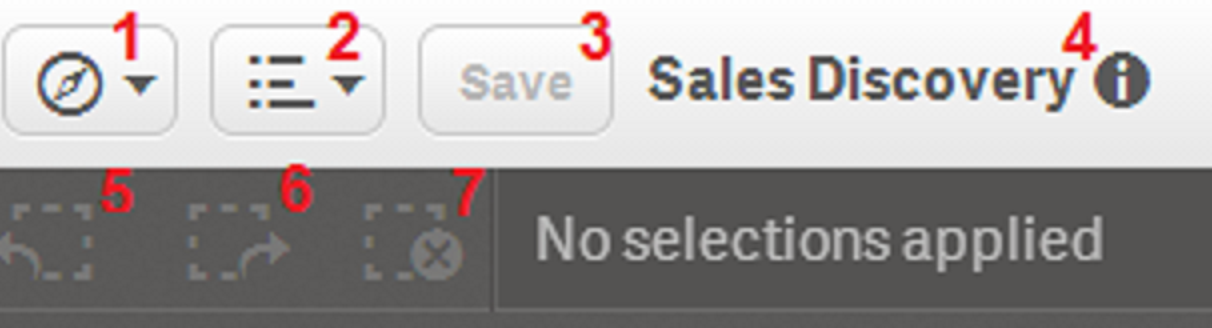
1. Navigation Menu – This menu allows you to navigate to different areas of Qlik Sense desktop.
a. App Overview – Go back to the main screen within the current app and view the sheet layout of the app.
b. Data load editor – Create or modify the data load script.
c. Data model viewer – See how the tables are structured within the app and preview the data.
d. Open hub – Go back to the area where you can see all of the available apps.
2. Menu – This menu offers options to learn more about Qlik Sense Desktop as well as the option for the Quick data load.
a. Quick data load – Allows you add new data to the app or add files to replace the existing data.
b. Help – This is where you can find answers to all Qlik Sense related questions.
c. About – This will tell you which version of Qlik Sense Desktop you are running.
3. Save – Saves changes made to the app.
4. Information about the app – View the app thumbnail, title, last loaded date, file name, and the app description.
5. Step back – Reverse the last selection made within the app.
6. Step forward – Reapply the last selection.
7. Clear all selections – this will remove all current selections.
Top right navigation
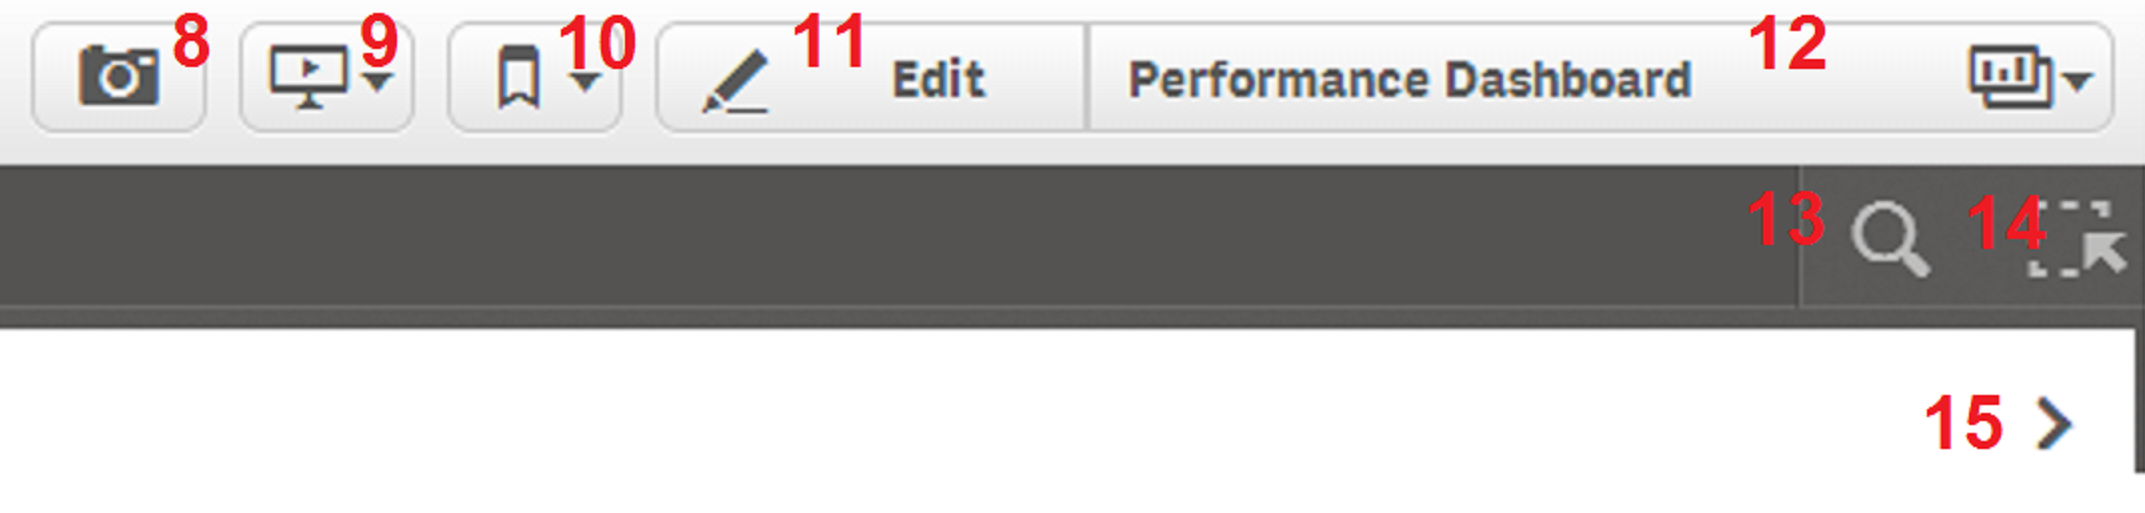
8. Take a snapshot – This allows you to take a snapshot of the different objects within the app. Snapshots can be used within
Storytelling.
9. Storytelling – This area allows you build a story about your data. Use images, snapshots, objects and text to create a
compelling story about your data.
10. Bookmarks – This allows you to create and save different selection states to be used at a later time.
11. Edit / Done – This button allows you to edit the sheet. Create visualizations, measures, etc. Once you are finished in edit
mode, select done to see your how your changes respond to user interaction.
12. Sheets – This allows the user to move around from sheet to sheet within the app.
13. Search Tool – Selecting this option will allow you to search your data for a particular value.
14. Selections Tool – This option allows you to view and select from all of the data fields available as well as view the current
selections.
15. Sheet navigation - Navigate to the next sheet or the previous sheet.
Now that you know where the navigation options are located and what they allow you to do, go ahead start developing your Qlik Sense apps! Happy Qliking!
You must be a registered user to add a comment. If you've already registered, sign in. Otherwise, register and sign in.