Description: Saving reports where you want them is easy and flexible with NPrinting. You can save reports to the default folder, recipient folders or custom folders which you generate dynamically. Custom folder names can be composed of various elements including the recipient name, the recipient subfolder name, and the value of any QlikView variable available at the time the report is generated.
Enable Custom Folder Feature
Open up your Excel or QlikView Report Task
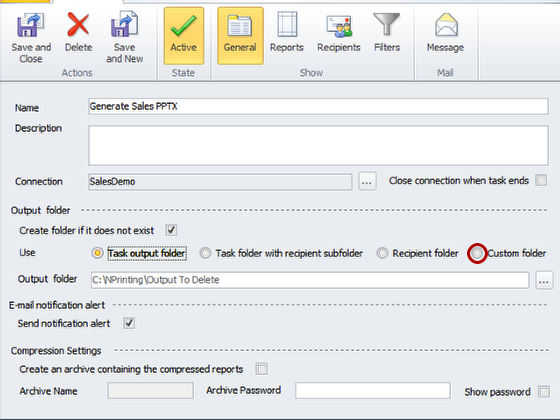
Select the Custom folder radio button to enable the Custom folder feature and start creating the directory where you want to save your reports
Select Elements to Compose Folder Path
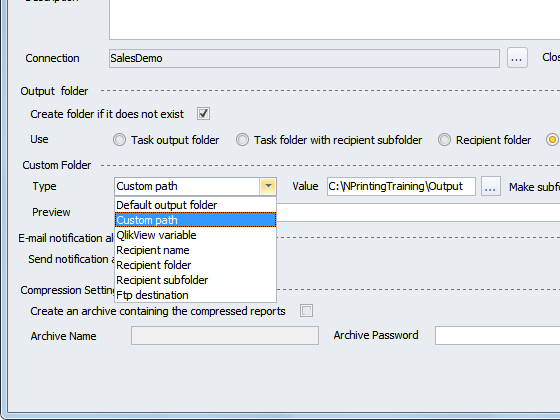
There are various elements you can use to compose the output path.Select the elements you want from the drop-down list. Elements include:
Default output folder - a static path set to C:\NPrinting\Output To Delete under Report settings in the Optionsdialog window
Custom path - a static path you choose
QlikView variable - creates a subfolder having as its name the value of a QlikView variable at the time of report generation in the path to the output folder
Recipient name - creates a subfolder having the recipient's name in the path to the output folder
Recipient folder - this path is defined as a recipient property
Recipient subfolder - this path is defined as a recipient property
FTP destination - must be in first position to establish the remote destination that is set in the FTP Destinationwindow under the Tools tab
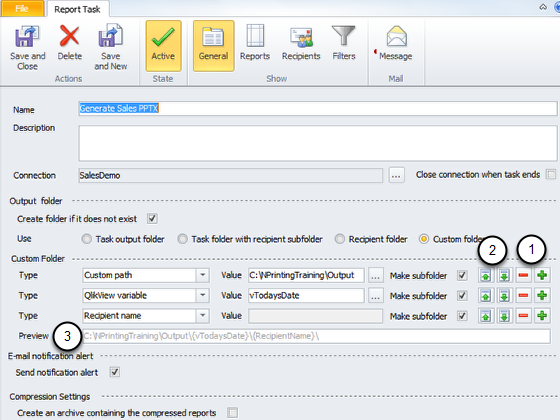
Add as Many Elements as You Want
You can add as many elements as you want to the output path and they will be concatenated. You can shift positions of the various elements within the path name.
Click on the green '+' to add an element below the current one and the red '-' to eliminate the current element
Use the green arrows to move elements up (to the left) and down (to the right) within the path