Unlock a world of possibilities! Login now and discover the exclusive benefits awaiting you.
- Qlik Community
- :
- Support
- :
- Support
- :
- Knowledge
- :
- Member Articles
- :
- How to Add Tables of Contents to PixelPerfect Repo...
- Move Document
- Delete Document
- Subscribe to RSS Feed
- Mark as New
- Mark as Read
- Bookmark
- Subscribe
- Printer Friendly Page
- Report Inappropriate Content
How to Add Tables of Contents to PixelPerfect Reports
- Move Document
- Delete Document
- Mark as New
- Bookmark
- Subscribe
- Mute
- Subscribe to RSS Feed
- Permalink
- Report Inappropriate Content
How to Add Tables of Contents to PixelPerfect Reports
Description: Learn how to create a well formatted PixelPerfect Chart and add a Table of Contents to an existing PixelPerfect report. Before starting this tutorial please:
- Download the latest NPrinting Training Material version and extract it into C:\NPrintingTraining\ so that the the relative path structure continues to be valid
- Install the latest version of NPrinting from our download page
- Execute the tutorial How to Add Totals and Subtotals to PixelPerfect Reports
Clone Report
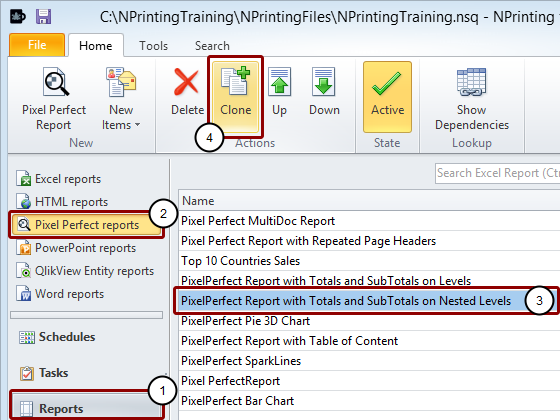
- Select Reports in the lower left pane
- Select PixelPerfect Reports in the upper pane
- Select PixelPerfect Report with Totals and SubTotals on Nested Levels from the report list
- Click on the Clone icon in the Actions group of the tool bar
Open Report in Editor

Rename and Open Pre-existing Template in Template Editor
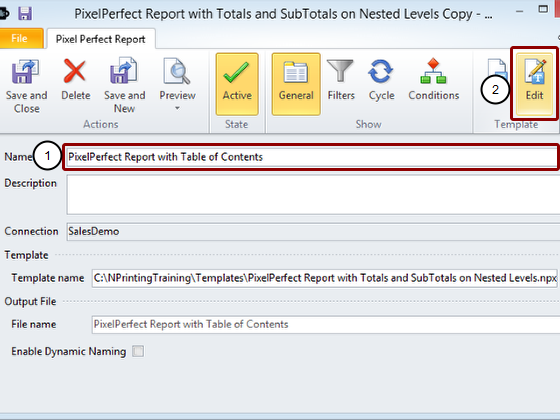
- Rename the report to PixelPerfect Report with Table of Contents
- Click on the Edit icon in the Template group of the tool bar
Open "Save As" Window
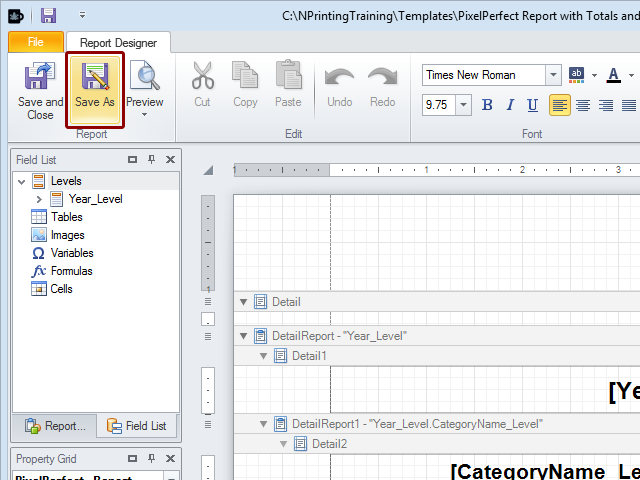
Click on the Save As icon in the Report group.
Save Renamed Template
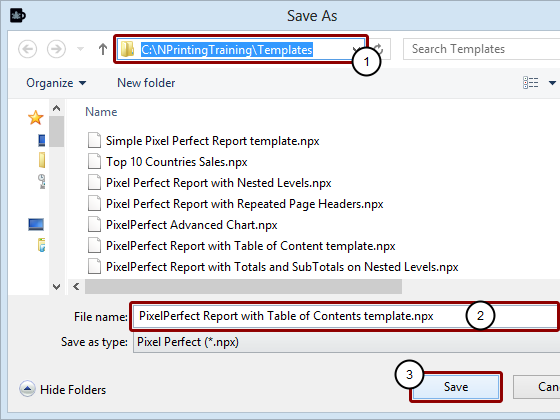
- Make sure that the Save as window is opened in the C:\NPrintingTraining\Templates\ folder. If not, browse to it.
- Change the template File name from PixelPerfect Report with Totals and SubTotals on Nested Levels.npx toPixelPerfect Report with Table of Content template.npx
- Click on the Save button
Select [Year] Heading
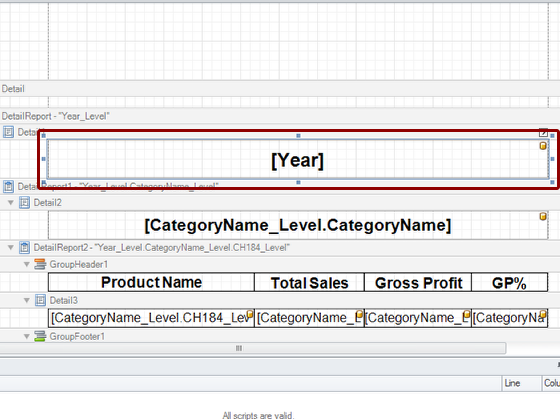
The first task is to set the headings as bookmarks. Year will be primary and Category Name secondary.Select the Year heading in the Detail1 range
Make [Year] Heading Primary Bookmark
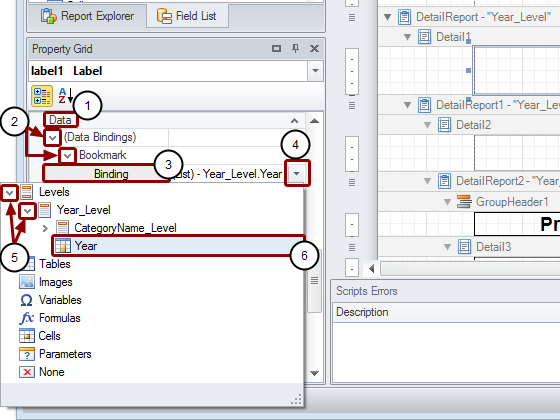
- Find the Data group in the Property Grid in the left lower pane
- Expand the (Data Bindings) and Bookmark nodes by clicking on the small angle bracket '>' to the left of each
- Select the Binding node
- Open the Binding drop-down menu by clicking on the down pointing triangle at the extreme right of the Bindingfield
- Expand the Levels and Year_Level nodes by clicking on the small angle bracket '>' to the left of each
- Select the Year node by double clicking on it
Select [CategoryName_Level.CategoryName]
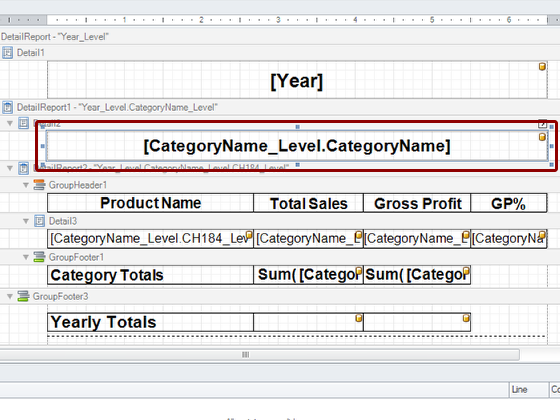
Select [CategoryName_Level.CategoryName] in Detail2.
Create Secondary Bookmark
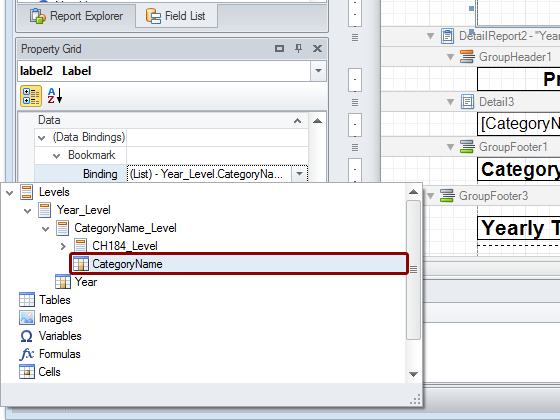
Repeat the above procedure adding the expansion of the CategoryName_Level node and selecting theCategoryName node instead.
Begin Defining Bookmark Hierarchy
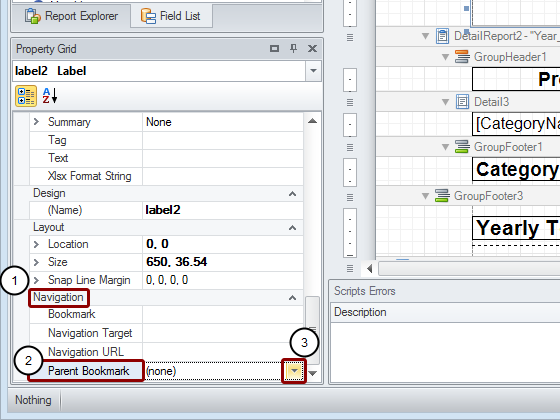
- Scroll down the Property Grid until you reach the Navigation group
- Select Parent Bookmark
- Open the Parent Bookmark pop-up menu by clicking on the down pointing triangle at the extreme right of theParent Bookmark field
Define Level as Child of Detail1

- Expand the DetailReport and Detail1 nodes
- Select the Label1 node by double clicking on it.
Create ReportHeader Bar
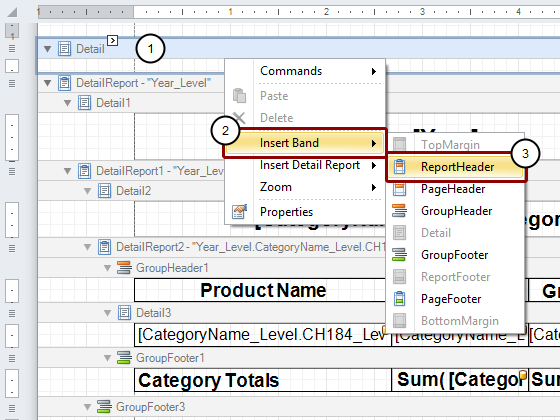
- Right click on the Detail bar
- Select Insert Band
- Click on ReportHeader
Embed Table of Contents in ReportHeader
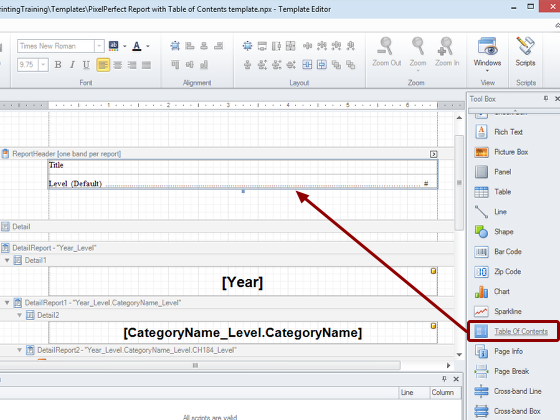
Drag the Table of Contents icon into the template and drop it into the ReportHeader range.
Configure Table of Contents Behavior
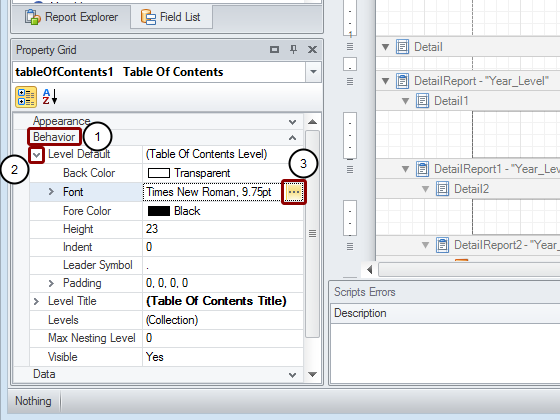
Widen the Property Grid on the left side of the NPrinting window.
- Go to the Behavior group
- Expand the Level Default node
- Click on the browse button at the extreme right of the Font field
Set Table of Contents Font Characteristics
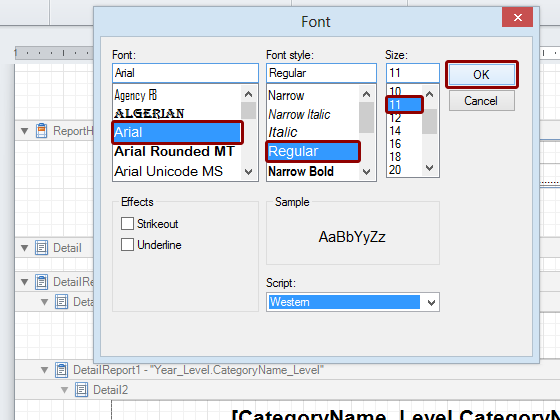
Set the Font to Arial, Regular, and 11pt, then click on the OK button.
Configure Level Heading

Set the Font to Arial, Bold, and 12pt, then click on the OK button.
Enter Level Heading Text

Enter Table of Contents for the heading text.
Save Template and Close Template Editor
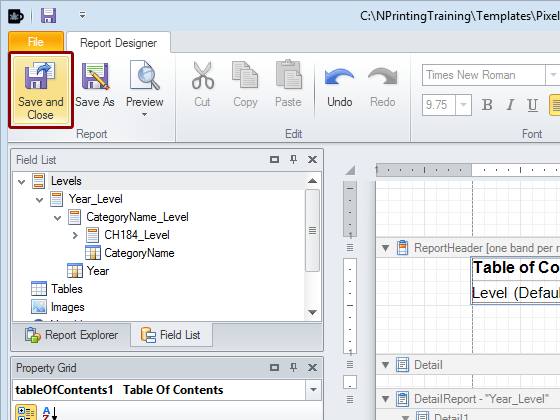
Click on the Save and Close icon in the Report group of the tool bar.
Run Preview
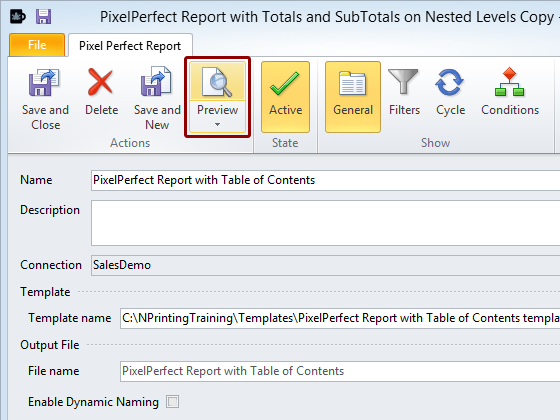
Get a PDF report with a Table of Contents at the beginning by clicking on the Preview icon in the Actions group.
Inspect Final PDF Report
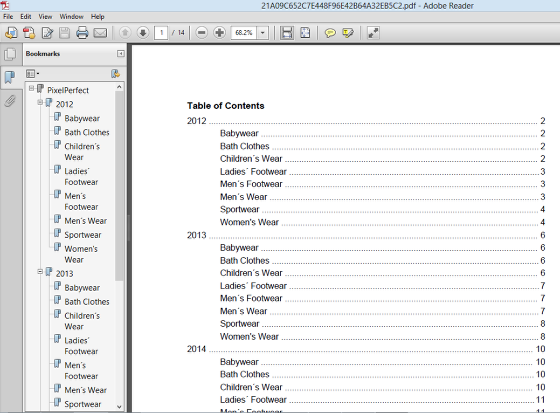
The rows are PDF bookmarks so clicking on one of them moves the document to the respective page.