Unlock a world of possibilities! Login now and discover the exclusive benefits awaiting you.
- Qlik Community
- :
- Support
- :
- Support
- :
- Knowledge
- :
- Member Articles
- :
- How to Create Printed Hard Copies of Your Reports
- Move Document
- Delete Document
- Subscribe to RSS Feed
- Mark as New
- Mark as Read
- Bookmark
- Subscribe
- Printer Friendly Page
- Report Inappropriate Content
How to Create Printed Hard Copies of Your Reports
- Move Document
- Delete Document
- Mark as New
- Bookmark
- Subscribe
- Mute
- Subscribe to RSS Feed
- Permalink
- Report Inappropriate Content
How to Create Printed Hard Copies of Your Reports
Nov 16, 2015 6:01:03 AM
Nov 16, 2015 6:01:03 AM
There is no need to generate Office reports and then print them out by hand. NPrinting can send reports directly to printers to produce hard copies automatically. This tutorial shows how to create a task to do this.
For the purposes of this tutorial, you have launched NPrinting and opened an NPrinting file.
Create Task
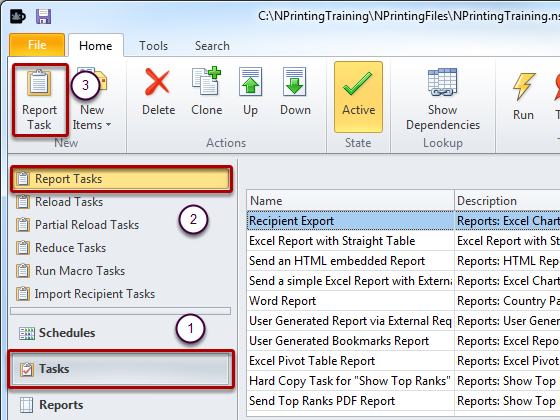
- Select Tasks on the Home tab
- Select Report Tasks
- Create a new task by clicking on Report Task
Give Task a Name
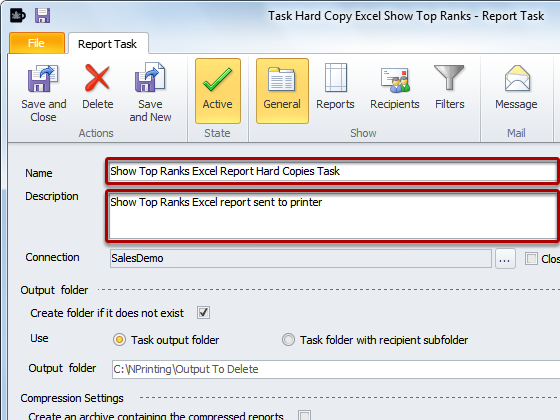
Give your new task a Name and enter a Description (optional)
Send to Printer
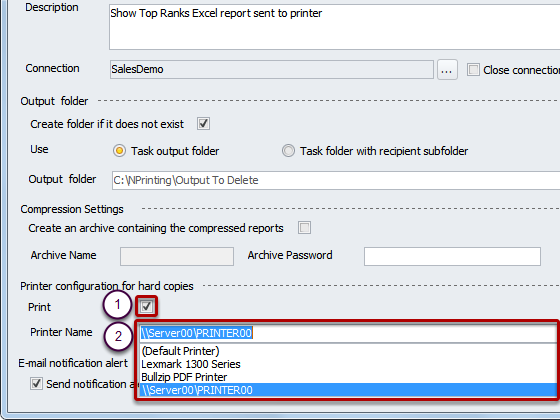
- Make sure the Print box is checked
- Enter a Printer Path and Name or select a printer from the drop-down menu
If you need to send the same report to various printers, clone the task to create a separate task for each printer. You cannot currently print more than one copy of a report per task without running the task repeatedly.
Add One or More Reports
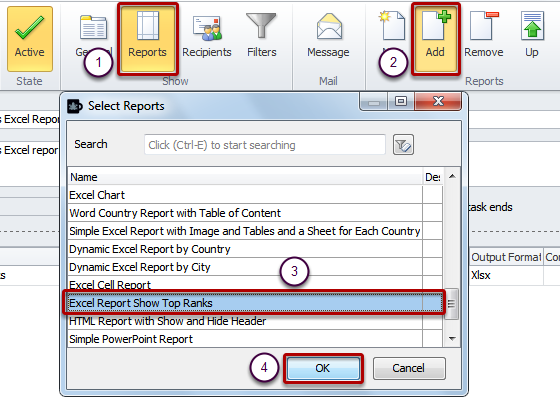
- Select the Reports icon
- Click on the Add icon in the Reports section
- Select one or more reports in the Select Reports dialog that opens
- Click on OK
Page size, orientation, margins, etc. must be set in the report template.
Prepare to Make Test Run
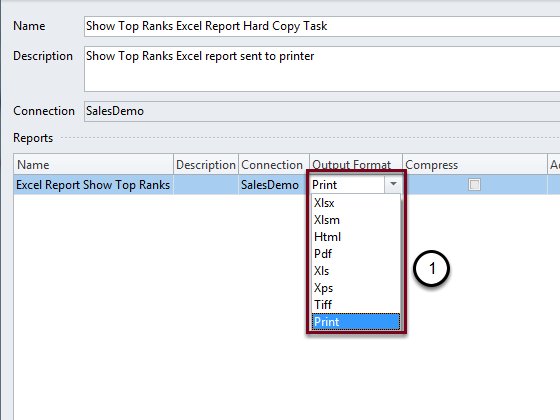
- Open the Output format drop-down menu and select Print
- Save and Close the task by clicking on the Save and Close icon in the Actions section of the menu bar.
The option Print is not available in the reports that export an Entire QlikView Sheet in QlikView Entity reports. If you want to export an Entire QlikView Sheet you can do these steps:
- Create a Word report
- Insert the QlikView sheet into the Word template
- Create a new task and insert the Word report into it
- Set the task options to print a paper copy of the QlikView Sheet
Run Trial
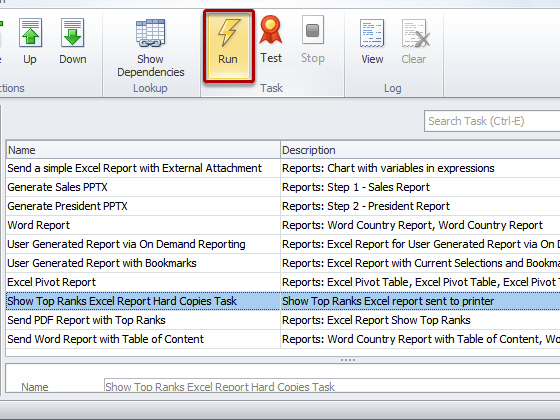
Before clicking on the Run icon in the Task section of the menu bar, it may be a good idea to reflect on the number of pages that will be printed.