Unlock a world of possibilities! Login now and discover the exclusive benefits awaiting you.
- Qlik Community
- :
- Support
- :
- Support
- :
- Knowledge
- :
- Member Articles
- :
- How to Use NPrinting On-Demand to Set Recipients i...
- Move Document
- Delete Document
- Subscribe to RSS Feed
- Mark as New
- Mark as Read
- Bookmark
- Subscribe
- Printer Friendly Page
- Report Inappropriate Content
How to Use NPrinting On-Demand to Set Recipients in Tasks
- Move Document
- Delete Document
- Mark as New
- Bookmark
- Subscribe
- Mute
- Subscribe to RSS Feed
- Permalink
- Report Inappropriate Content
How to Use NPrinting On-Demand to Set Recipients in Tasks
We suggest that you review How to Use Specific Filters with NPrinting On-Demand Reporting before doing this tutorial.
Forms inside NPrinting Extension Objects accept QlikView formulas as an argument. You’ll learn in this tutorial how to use them to select recipients and send reports. We’ll display a list box containing recipients in a QlikView document to let users select one or more recipients. Users select recipients the same way they select QlikView filters. Click on an NPrinting Task Extension that retrieves the names of the selected recipients and sends them filtered reports.
The steps are:
- Create recipients in NPrinting with filters
- Create an NPrinting task that sends a report via email
- Load a list of recipients into the QlikView document and display their names
- Create an NPrinting Task Extension that runs the task
The NPrinting Training Material contains a working example for this tutorial. Please download NPrinting Training Material if you haven't recently done so, and extract it into C:\NPrintingTraining\ so that the relative path structure continues to be valid.
Create New Recipient
Open the NPrinting document, OnDemand.nsq, in C:\NPrintingTraining\NPrintingFiles\
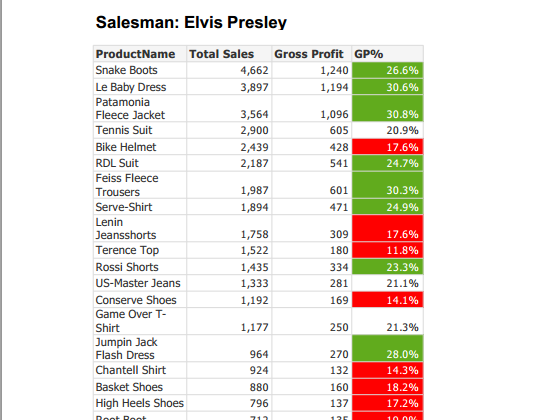
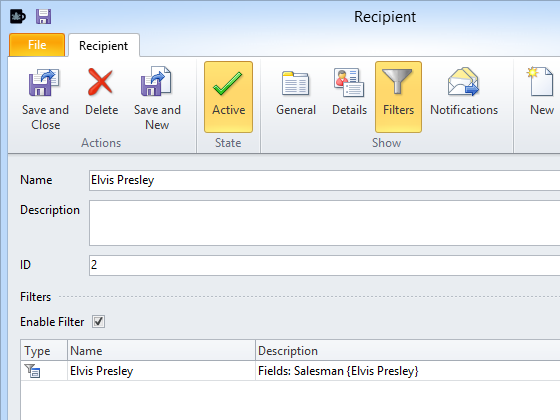
- Add a recipient named Elvis Presley
- Add a filter for Salesman=Elvis Presley
- Set an email address that you can read
- Save and New
Create a Second Recipient
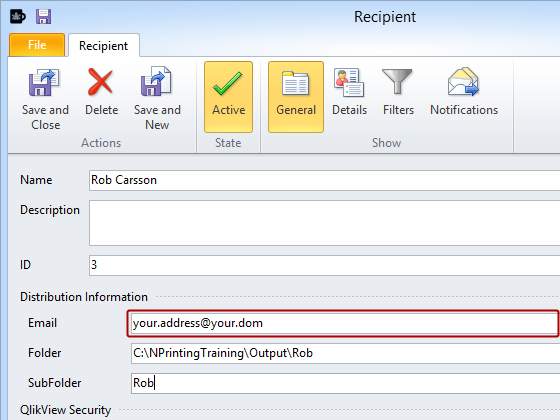
Add recipient Rob Carsson without filters
- Set an email address that you have access to
- Save and Close
Create an NPrinting Task
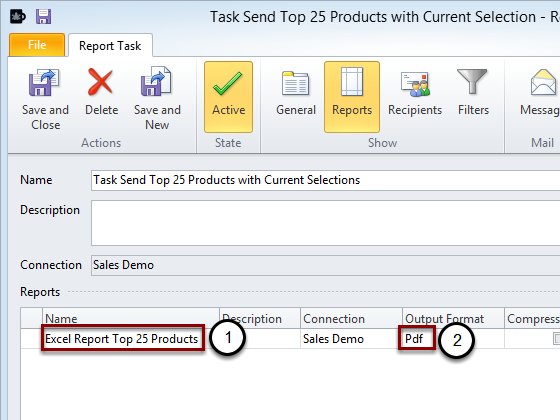
Create an NPrinting task named Task Send Top 25 Products with Current Selections.
See: How to Create Tasks
- Add the "Excel Report Top 25 Products" report
- Set Output Format to PDF
Activate Send Email and Create a Message
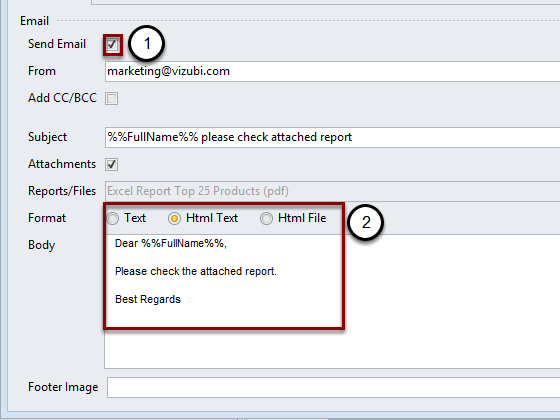
- Activate the Send Email feature by putting a check mark in the box
- Create a message. See: What elements can I add to NPrinting e-mail?
Save and close the task. Click on YES on the warning message that asks you to insert at least one recipient: you can leave the Recipients List empty. Save the NPrinting project.
Load Recipients into the QlikView Document
Add Additional Recipients to Script

- Add this code at the beginning:
- Reload the document
Add a List Box
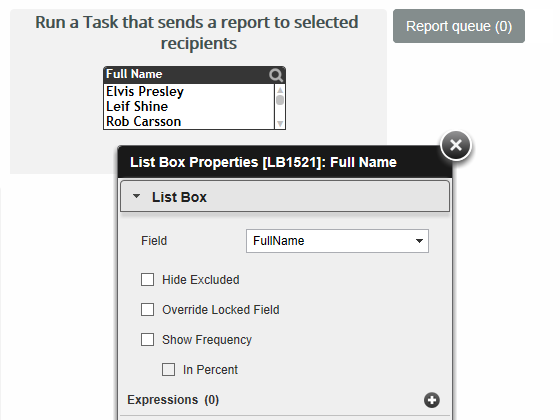
- Add a List box to the Simple On-Demand sheet to display the field Fullname
- Save the QlikView Document
Embed NPrinting Task Extension and Configure Button Appearance
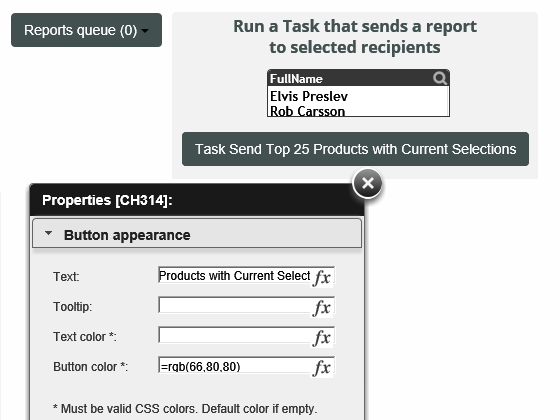
- Create an NPrinting Task Extension that runs the Task Send Top 25 Products with Current Selections task
- Right click on the sheet
- Select New Sheet Object
- Click on Extension Objects
- Drag and drop the NPrinting Task object onto the sheet
- Right click on the object
- Select Properties
- Click on the "Button appearance" bar and edit
Configure On-Demand Service Connection
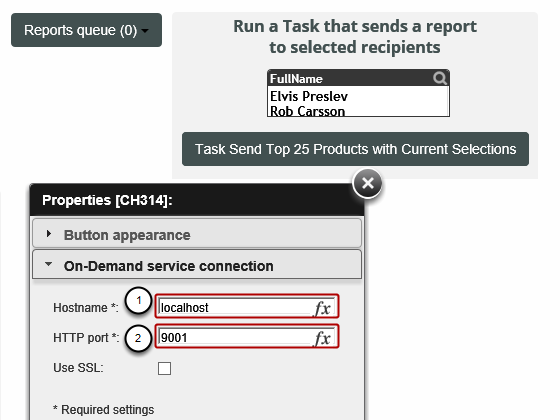
- Hostname: localhost
- HTTP Port: 9001
Configure Task Settings
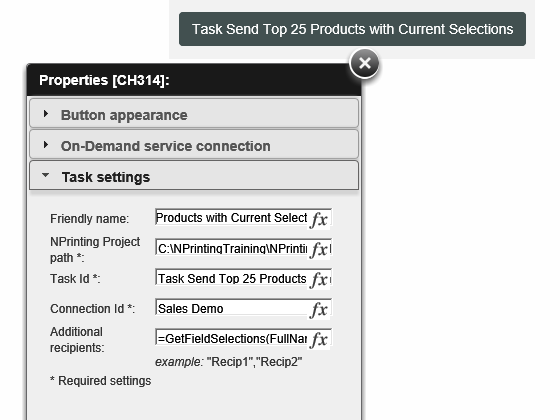
- Click on the Task settings bar
- Friendly name: Task Send Top 25 Products with Current Selections
- NPrinting Project path: C:\NPrintingTraining\NPrintingFiles\OnDemand.nsq
- Report ID: Task Send Top 25 Products with Current Selections
- Connection ID: Sales Demo
- Additional recipients: insert the QlikView formula =GetFieldSelections(FullName). This formula returns the selected active recipients and sends them to NPrinting Service, so it will send them the reports. Dynamic selection is obtained using this QlikView formula.
Configure Filter Settings
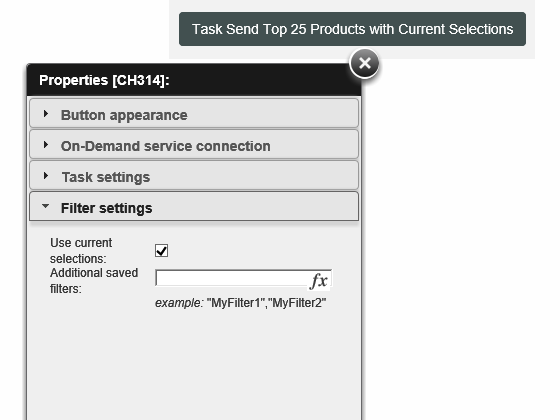
- Click on the Filter settings bar
- Use current selections: check marked
- Close the Properties editor
- Save the QlikView document
Send Report to a Recipient
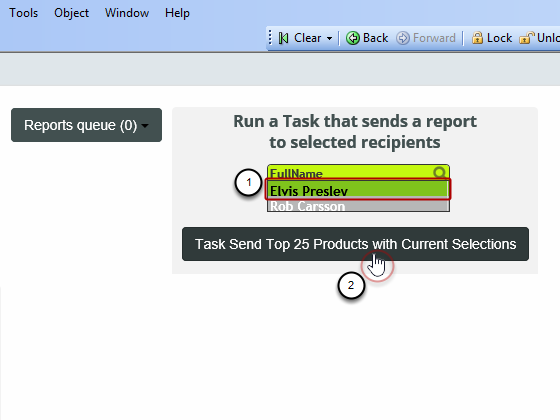
- Select an additional recipient, Elvis Presley for instance
- Click "Task Send Top 25 Products with Current Selections"
Check E-mail
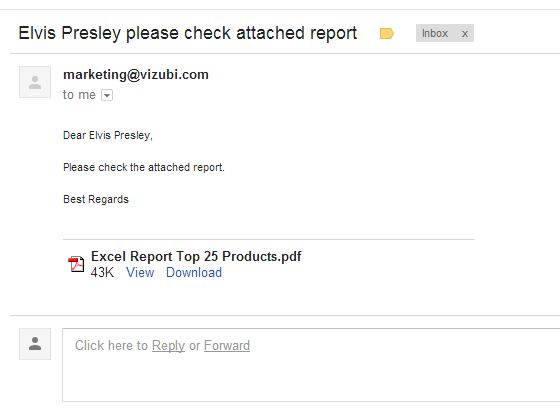
When the NPrinting Queue button shows that the task has completed, check the e-mail account that you've associated with the Elvis recipient and you’ll find the report.
Inspect Report