Unlock a world of possibilities! Login now and discover the exclusive benefits awaiting you.
- Qlik Community
- :
- Support
- :
- Support
- :
- Knowledge
- :
- Member Articles
- :
- How to Create Tasks
- Move Document
- Delete Document
- Subscribe to RSS Feed
- Mark as New
- Mark as Read
- Bookmark
- Subscribe
- Printer Friendly Page
- Report Inappropriate Content
How to Create Tasks
- Move Document
- Delete Document
- Mark as New
- Bookmark
- Subscribe
- Mute
- Subscribe to RSS Feed
- Permalink
- Report Inappropriate Content
How to Create Tasks
Nov 9, 2015 10:15:17 AM
Nov 9, 2015 10:15:17 AM
This lesson demonstrates the procedure for creating a task. It is presumed that you are familiar with common NPrinting procedures.
We are going to create and send an e-mail message having a Word, an Excel, and a PowerPoint report as attachments and an HTML report embedded in the message body.
For the purpose of this demo, the following needs to have already been done:
- configure an output folder, see: Report Settings section of Configure Options and Dynamic Output Paths
- establish a connection to a QlikView document, see: How do I connect to my QlikView documents?
- configure E-mail properties, see: How do I set up e-mail in NPrinting?
- create or import a recipient list, see: How to Create and Import Recipients with Filters and Distribution Groups
- create the:
- Excel report template, see: How to Create Excel Reports
- Word report template, see: How to Create Word Reports
- Powerpoint report template, see: How to Create PowerPoint Reports
- HTML report template, see: How to Create HTML Reports
- create the NPrinting file that uses all of these resources to create and distribute reports
Open NPrinting File
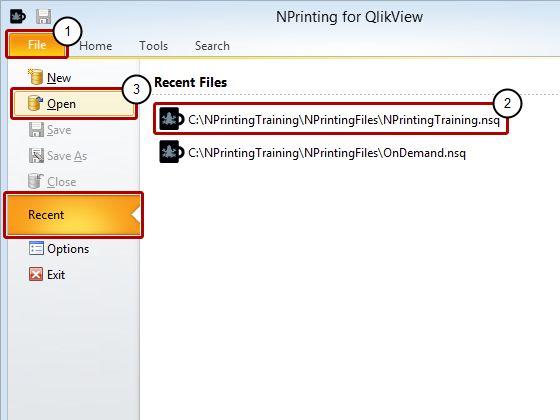
- Select the File tab
- Recent is preselected, click on your file in the Recent Files list
- Select Open and browse to the folder containing your .nsq file if it is not in the Recent Files list
Add New Task
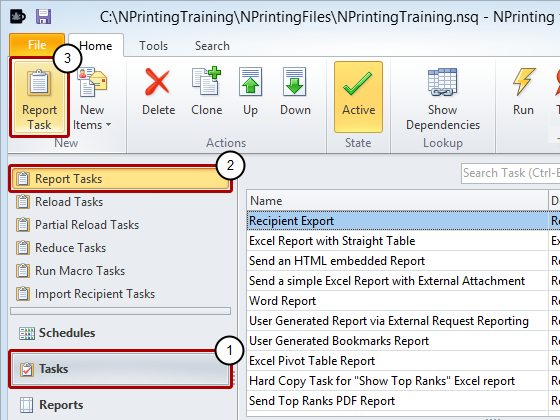
- Select Tasks in the lower left pane
- Select Report Tasks in the upper pane
- Select Report Task from the New group
Create Task and Prepare to Add Reports to Task
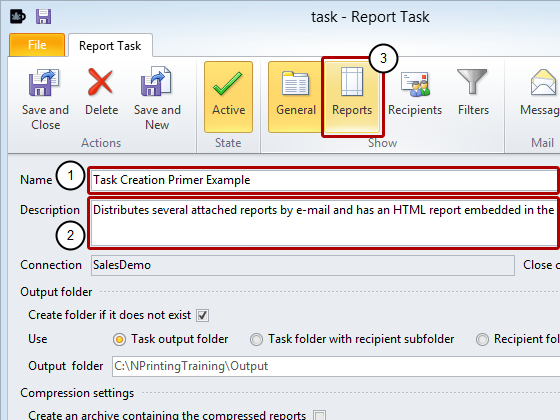
- Give your task a Name
- Optionally enter a Description
- Select Reports in the Show group of the tool ribbon
The Close connection when task ends flag
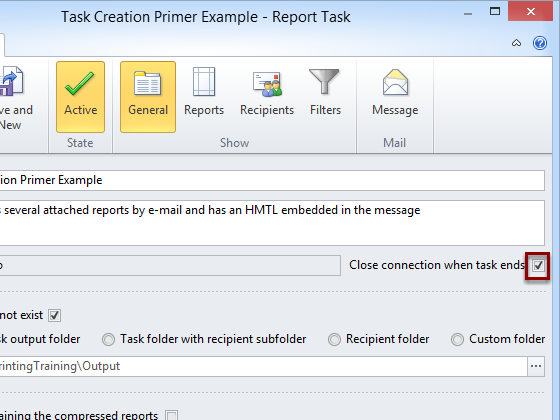
When activated it closes the connection to the QlikView document after task execution without saving the .qvw. It is disabled by default.
If you enable this flag and the next task uses the same .qvws you will need to wait for the .qvw files to re-open. All QlikView selections are restored to the initial status.
If you disable this flag the .qvws will be closed when the task ends. This frees up computer RAM.
Open Select Reports Window

Click on the Add icon in the Reports group of the tool bar.
Select Reports to Distribute
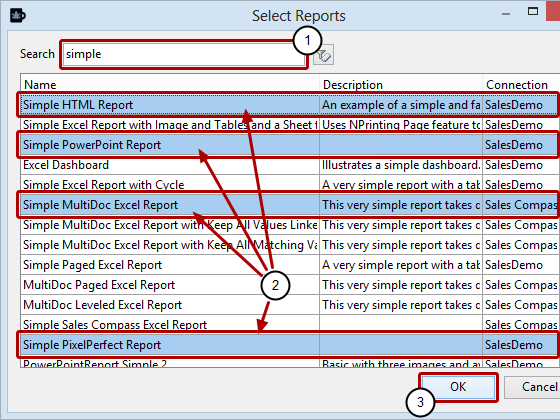
- Choose Add in the Reports group
- Select the Excel, Word, Powerpoint, PixelPerfect, and HTML Reports or some of your own
- Select OK
Choose Report Output Type

Choose the Output Format for the reports you want to distribute in a format different from their native ones
- Click on the cell in the Output Format column next to the report
- Select the Output Format from the drop-down menu if it is to be different from the Report Template format
Reviewing Output Formats

The PowerPoint, Word and PixelPerfect reports will be issued as PDF reports, while the Excel and HTML reports will be issued in their native formats for the purpose of this tutorial.
Select Recipients
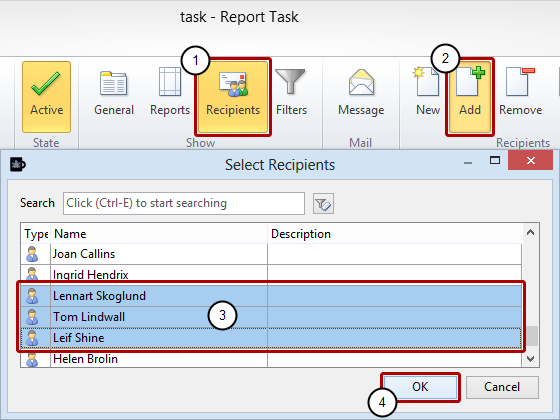
- Select Recipients in the Show group of the tool bar
- Choose Add in the Recipients group
- Select appropriate recipients from the Recipients list in the Select Recipients window
- Click on the OK button
Add and Configure Message: Part I
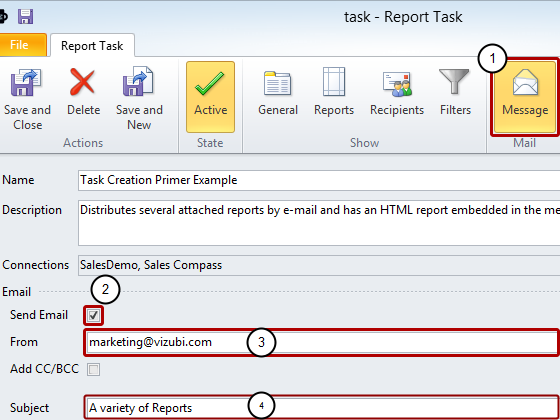
- Select Message in the Mail group of the toolbar
- Check the Send Email box at the left below the Email line
- Enter the sender e-mail address in the From field
- Fill in the Subject field
Configure Message: Part II
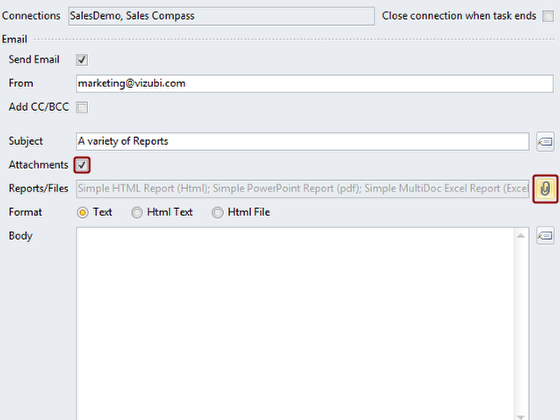
- Make sure the Attachments box is checked
- Click on the paperclip icon to the right of the Reports/Files field to select the reports to be distributed as attachments
Select Reports to Be Distributed as Attachments
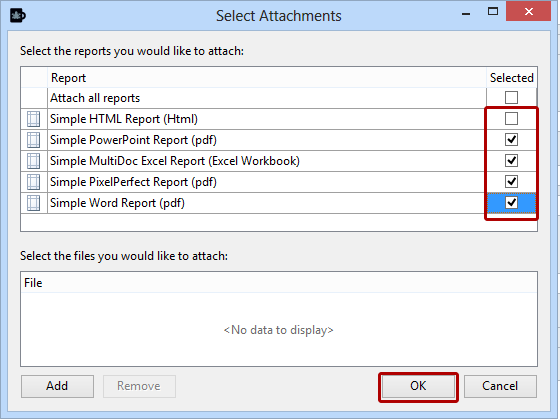
- Select the Powerpoint, Excel, and Word reports or your own and deselect the HTML report by clicking on the corresponding boxes in the Selected column
- Click on the OK button
Prepare to Write Your Message and Include QlikView and NPrinting Variable Tags in It
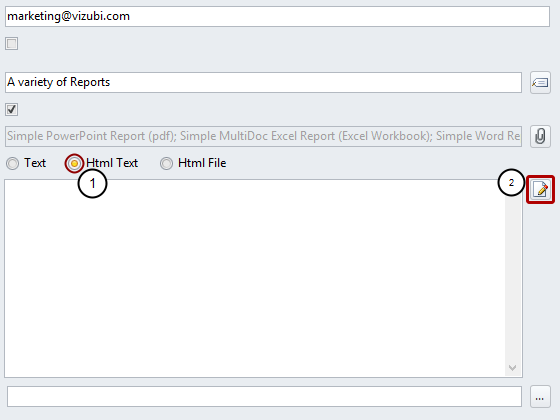
- Set the Format radio buttons to Html Text
- Open the message Editor window by clicking on the paper and pencil icon to the right of the message Body box
Write Greeting and then Select Recipient's Name Variable Tag
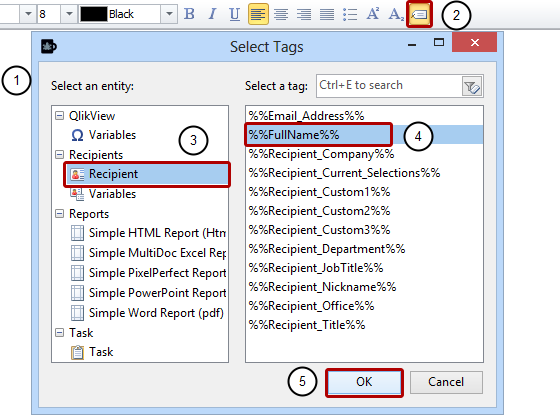
- Type "Hi" or some appropriate greeting and a space in the message Editor window
- Open the Select tags window by clicking on the tag icon at the right of the message formatting tool bar
- Select Recipient in the Select an entity pane on the left
- Find and select the %%FullName%% variable tag in the Select a tag pane on the right
- Click on the OK button, and continue writing your message
Select Report Tag to Be Embedded in Message
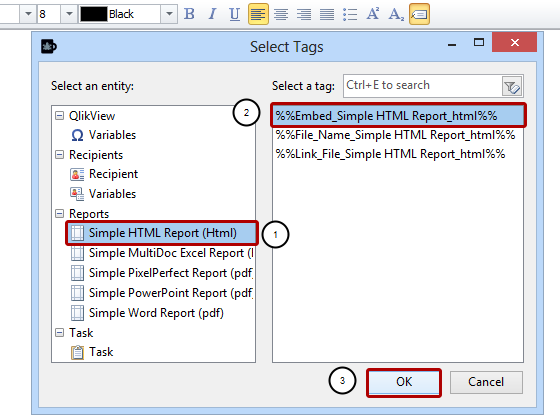
To embed the HTML reports in the message reopen the Select tags window
- Select Reports in the Select an entity pane of the Select Tags window
- Select the %%Embed_Simple HTML Report_html%% variable tag in the Select a tag pane on the right
- Select the OK button
Repeat this procedure for the Simple PixelPerfect Report (HTML)
Finish Message and Save It in Task
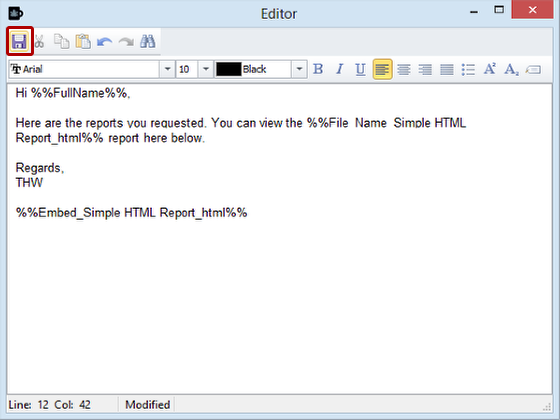
Conclude the message and click on the floppy disk icon at the left end of the toolbar to save the message in the task
Make Last Checks and Save Task
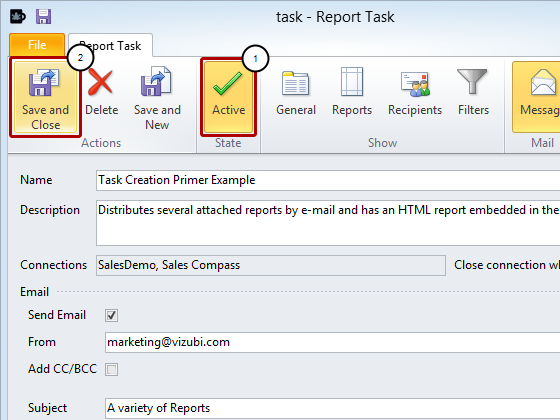
- Make sure that the Active button in the State group indicates that the task is active.
- Select the Save and Close icon in the Actions group in the Report Task window
Run Task

- Make sure that Task Creation Primer Example is selected
- Click on the Run icon in the Task group and when processing finishes, check the recipient's mailbox
Successful Task Execution
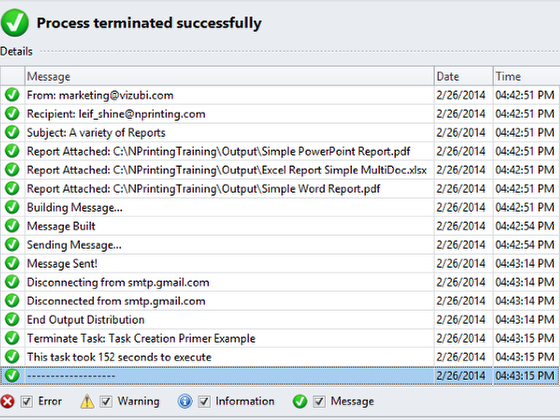
Send the Email
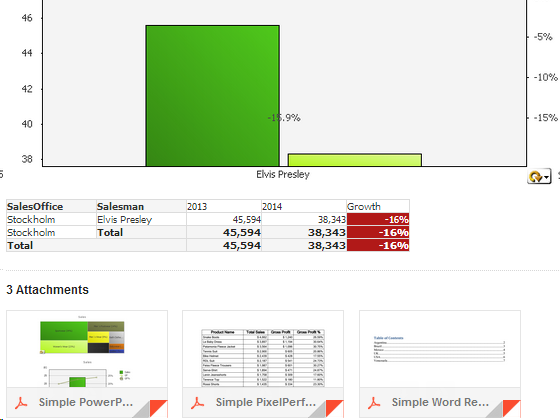
In the e-mail body you should find the embedded HTML reports. The three other reports are included as attachments.