Unlock a world of possibilities! Login now and discover the exclusive benefits awaiting you.
- Qlik Community
- :
- Support
- :
- Support
- :
- Knowledge
- :
- Support Articles
- :
- How to run an automation for failed reloads using ...
- Subscribe to RSS Feed
- Mark as New
- Mark as Read
- Bookmark
- Subscribe
- Printer Friendly Page
- Report Inappropriate Content
How to run an automation for failed reloads using Qlik Automate
- Mark as New
- Bookmark
- Subscribe
- Mute
- Subscribe to RSS Feed
- Permalink
- Report Inappropriate Content
How to run an automation for failed reloads using Qlik Automate
May 28, 2025 10:09:29 AM
Jul 18, 2023 6:54:10 AM
This article describes the setup of an automation to run every time an app reload fails.
This can be done using the new Reload status filter on the App Reload Finished webhook event.
The automation can trigger an alert to Microsoft Teams, Slack, or another messaging tool. It can also be used to create a ticket in Jira or ServiceNow to make sure someone in your team will follow up on the failed reload.
Configuring the automation
Start by creating a new automation from your Qlik Cloud tenant. You can do this through the Add new button in the upper-right corner of the Qlik hub. Choose to start with a blank template, give the automation a name, and follow the below steps to configure the webhook.
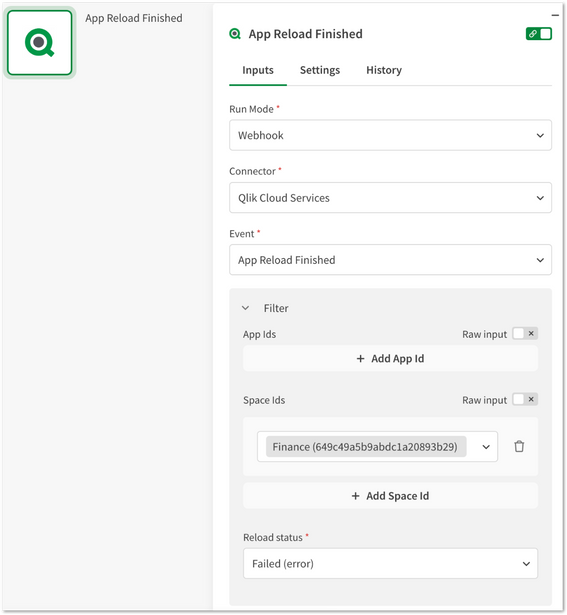
- Select the Start block in the automation canvas and configure the below settings in the Block Configuration menu on the right side of the canvas:
- Run Mode: Webhook
- Connector: Qlik Cloud Services
- Event: App Reload Finished
- Filter: Configure values for the App IDs and Space IDs parameters to narrow the webhook to specific apps or spaces. Then set the Reload status to "Failed (error)".
In the below example, the webhook is configured to listen to failed reloads in the "Finance" space.
- Add a block to take action on the failed reload.
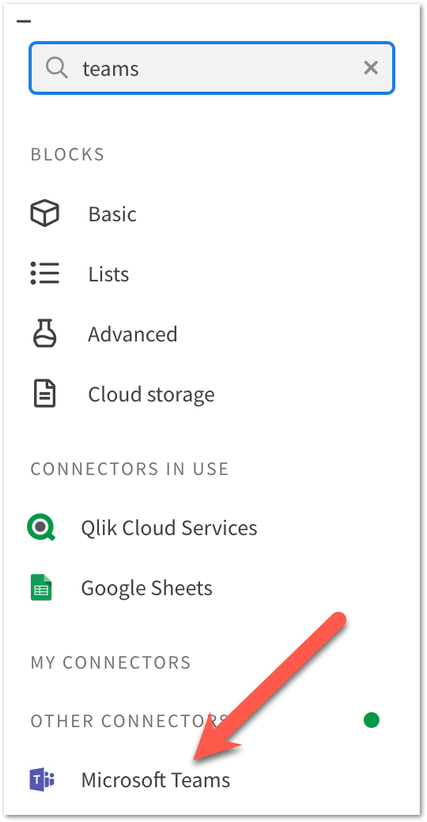
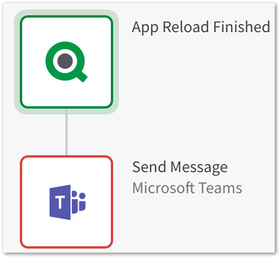
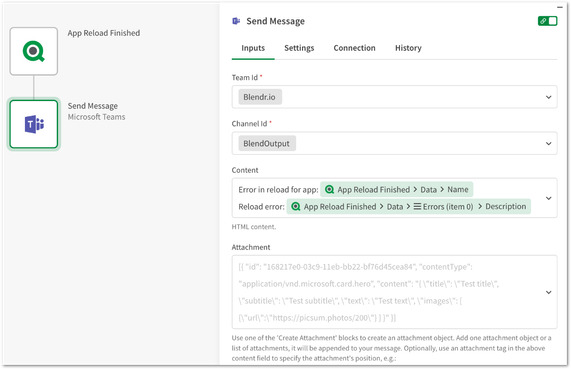
In this example, we'll send a message to a Teams channel in order to alert our team. For this, we'll use the Send Message block from the Microsoft Teams connector. You can find this connector and the block in the Block Library menu on the left side of the canvas. Click the connector to show all blocks and drag the Send Message block below the Start block. - Select the Send Message block to open the Block Configuration menu.
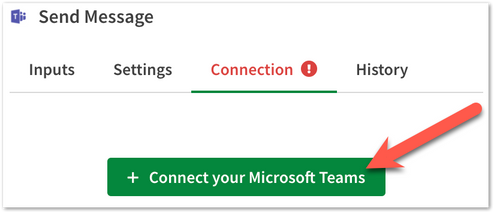
Go to the Connection tab to create a connection to your Microsoft Teams account.
- Go to the Inputs tab to further configure the Send Message block.
- Use the do lookup functionality to configure the Team ID and Channel ID parameters.
- Type a message in the Content parameter input field. To add information from the Reload Finished event, click the input box and click Output from App Reload Finished. This shows the output from previous runs or an example output.
- Click the parameters which you want to include in the message. Things like App Name, App ID, and Description from the Errors list could be interesting here. When the automation is run, these values will be concatenated into a single string.
- Below is an example image of the result in Microsoft Teams. Feel free to replace the block with a Create Ticket block from the Jira or ServiceNow connector or use a different messaging tool like Slack, SendGrid or Email.
Related Content:
Qlik Sense Reload and Task Best Practices
How to get started with Microsoft Teams in Qlik Automate
How to send chat messages using the Microsoft Teams connector
How to get started with SendGrid in Qlik Automate
How to send a message to a channel in Slack in Qlik Automate
Environment
The information in this article is provided as-is and to be used at own discretion. Depending on tool(s) used, customization(s), and/or other factors ongoing support on the solution below may not be provided by Qlik Support.
