Unlock a world of possibilities! Login now and discover the exclusive benefits awaiting you.
- Qlik Community
- :
- Blogs
- :
- Technical
- :
- Design
- :
- Mashup Editor - Create a Bootstrap Drop Down selec...
- Subscribe to RSS Feed
- Mark as New
- Mark as Read
- Bookmark
- Subscribe
- Printer Friendly Page
- Report Inappropriate Content
In many of my webpages that I've created using the Capabilities API, I had to create a custom menu and I always used Bootstrap's Dropdown component. In this tutorial I will show how to do the same.
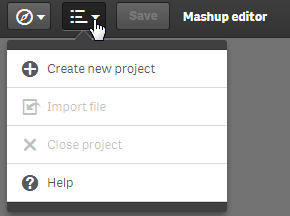
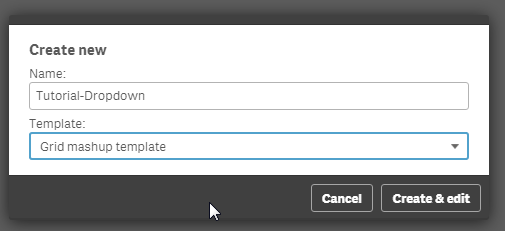
From the Mashup Editor, create a new project and give it a name, using "Grid Mashup Template". this will include bootstrap for you.
.

Select the app "Helpdesk Management.qvf".
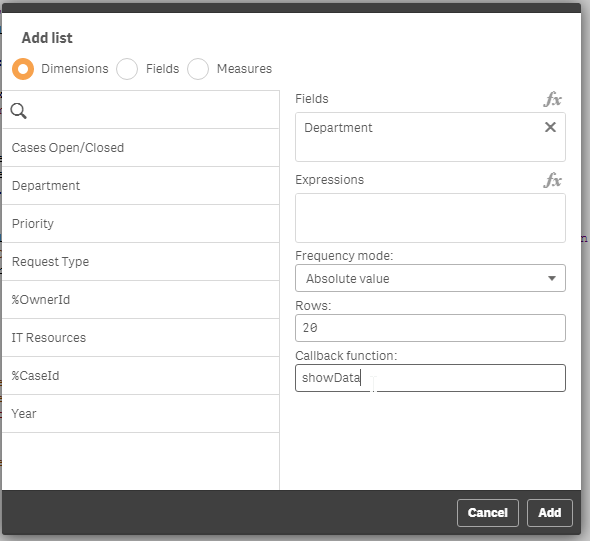
From the right hand side, create a list and select "Department" from the Dimensions. Make sure you add a callback function, since that is where we will put our code. Here, I named it showData.

Now, lets go to the html template and add the dropdown code.
In the div that has the id="QV01", add the following:
  <div class="col-sm-4 qvplaceholder" id="QV01">
   <div class="dropdown">
  <button class="btn btn-default dropdown-toggle" type="button" id="dropdownMenu1" data-toggle="dropdown" aria-haspopup="true" aria-expanded="true">
   Select Department
   <span class="caret"></span>
  </button>
  <ul class="dropdown-menu" aria-labelledby="dropdownMenu1">
  </ul>
   </div>
  </div>
In your javascript code, you will see a callback function created.
//callbacks -- inserted here --
function showData(reply, app){}
The reply has all of the data from the Dimension so we can create the list elements in the drop down. So, let's populate the drop down list elements.
function showData(reply, app){
     $('#QV01 .dropdown ul').empty()
     $.each(reply.qListObject.qDataPages[0].qMatrix, function(key, value) {
          if (typeof value[0].qText !== 'undefined') {
               $('#QV01 .dropdown ul').append('<li><a data-select="'+ value[0].qText+'" href="#">'+ value[0].qText+'</a></li>');
          }
     });
}
Notice that we empty the list first, otherwise every time we make a selection, the same elements will be added in the drop down.
Now, we have to add a jQuery on click event that will trigger the selection and change the button value.
$('body').on( "click", "[data-select]", function() {
     var value = $(this).data('select');
     app.field('Case Owner Group').selectValues([value], false, false);
     $('#QV01 .dropdown button').html(value + ' <span class="caret"></span>');
  });
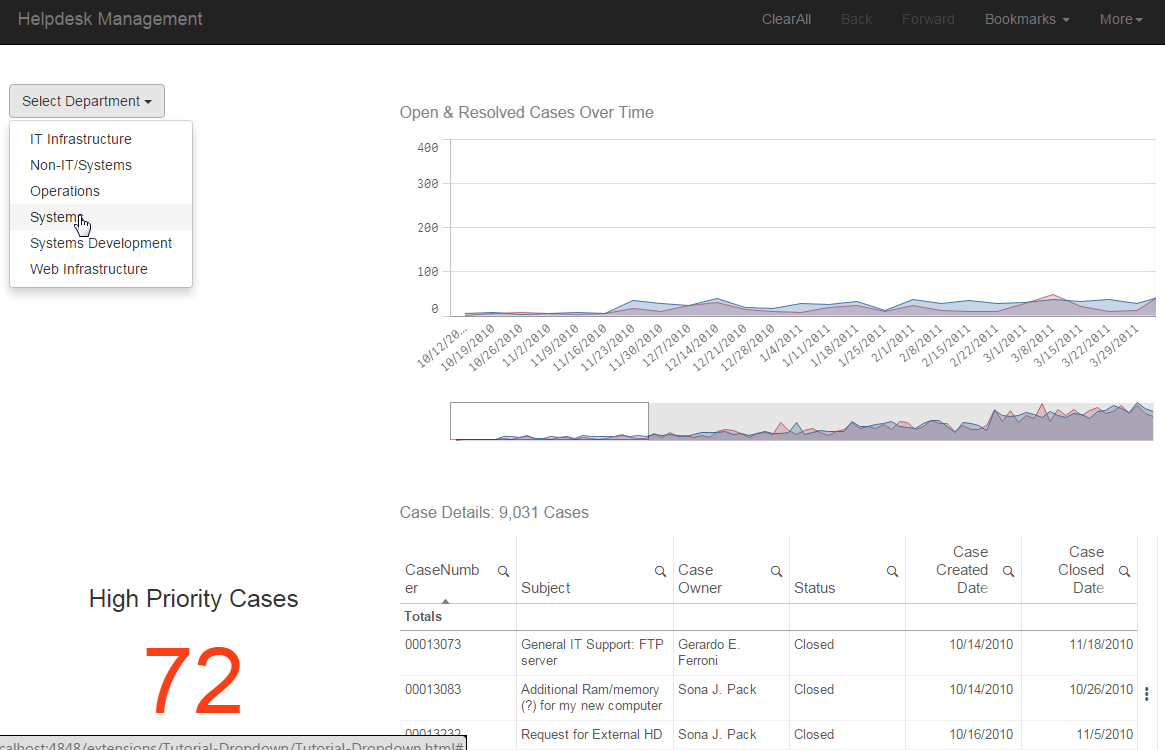
The selection drop down is ready. now lets add some more graphs to make it more interesting when we select a department. I added 'Open & resolved cases over time', the KPI 'High priority Cases' and 'Case Details'. So the final page should look like this:

Last, we must set the button to the original state after the user clicks on the "Clear All". We just add the following line in the code.
case 'clearAll':
     app.clearAll();
     $('#QV01 .dropdown button').html('Select Department <span class="caret"></span>');
     break;
- « Previous
-
- 1
- 2
- Next »
You must be a registered user to add a comment. If you've already registered, sign in. Otherwise, register and sign in.